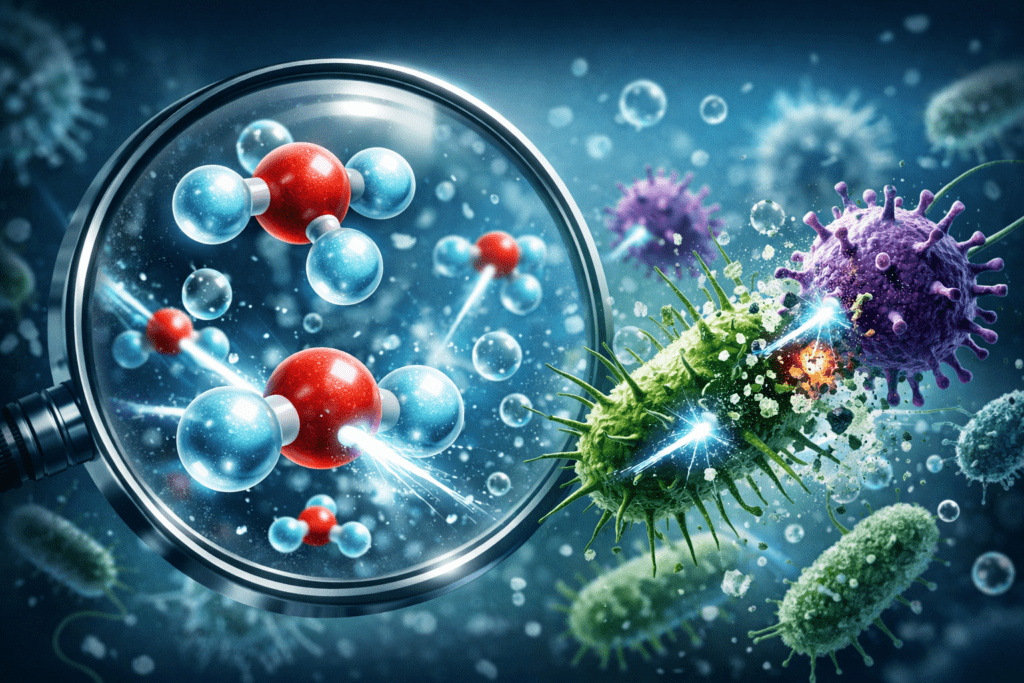
Author: Michele Matthews

  • Maintaining a Healthy Indoor Environment

    Maintaining a Healthy Indoor Environment

    Maintaining a Healthier Indoor Environment Starts at the Source

    Your home should feel clean—not just look clean.

    But here’s the truth most people don’t realize:
    👉 A large percentage of indoor air issues don’t come from visible dirt—they come from microscopic odor-causing compounds embedded in air, fabrics, and surfaces.

    That lingering pet smell…
    That musty basement odor…
    That “something’s off” feeling in the air…

    Those are signs of molecular-level contamination, not surface-level problems.

    This is where chlorine dioxide tablets change the game.


    What Are Chlorine Dioxide Tablets (and Why They Work Differently)
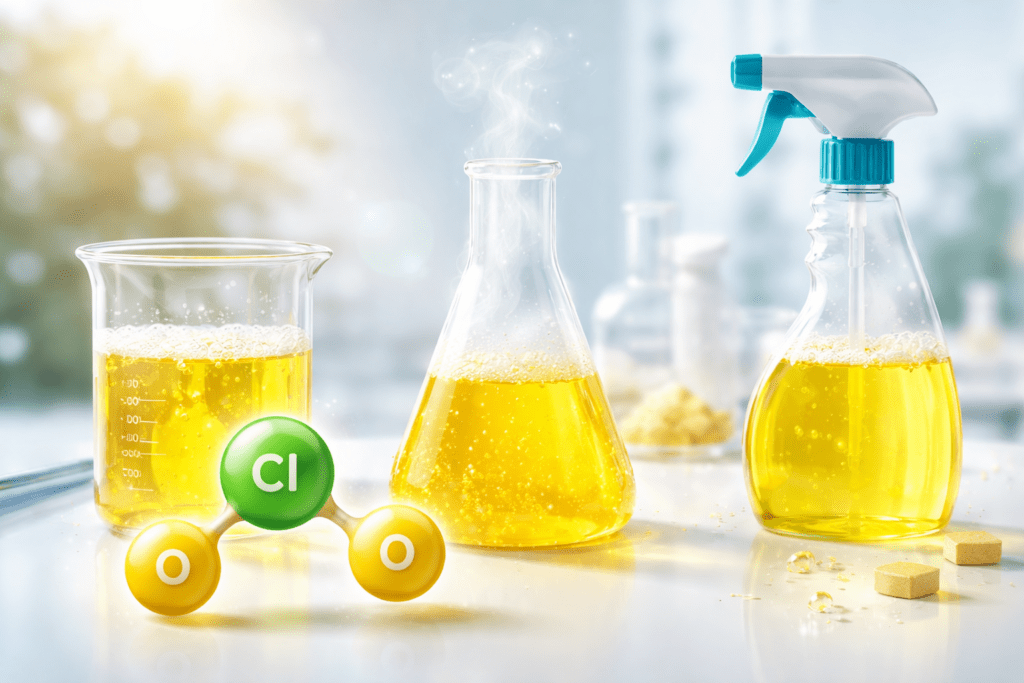
    Is ClO2 Safe for Cleaning Header

    Chlorine dioxide (ClO₂) is a selective oxidizing gas—and that word selective matters.

    Unlike traditional cleaning products that:

    • Mask odors with fragrance
    • Or attempt surface-level cleaning

    Chlorine dioxide works by:
    ✔ Penetrating into the airspace
    ✔ Reaching porous materials (carpet, drywall, fabrics)
    ✔ Breaking down odor-causing molecules at their source

    This is why it’s been trusted for decades in:

    • Water treatment systems
    • Food processing environments
    • Industrial odor control applications

    Now, that same technology is available in a controlled-release tablet format, making it practical for real-world indoor environments.


    The Real Problem: Why Odors Keep Coming Back

    Most homeowners unknowingly fight odor problems the wrong way.

    Common mistake:

    Using sprays, candles, or surface cleaners that only cover the smell

    The reality:

    Odors are caused by volatile organic compounds (VOCs) and other airborne molecules embedded in:

    • Carpets
    • Upholstery
    • Subflooring
    • HVAC systems
    • Wall materials

    If those molecules aren’t broken down at a chemical level,
    👉 the odor will return.


    How Chlorine Dioxide Eliminates Odors (Not Masks Them)

    Chlorine dioxide works through oxidation at the molecular level.

    Instead of adding scent, it:

    • Alters the chemical structure of odor molecules
    • Neutralizes their ability to produce smell
    • Leaves the space truly odor-free—not fragranced

    Real-world use cases:

    • 🐶 Pet odors embedded in carpet and padding
    • 🚬 Smoke odor in walls and fabrics
    • 🏚 Musty or damp basement environments
    • 🚗 Vehicle interior odor removal
    • 🏠 Pre-sale home odor treatment

    Use-Case Domination: Where These Tablets Excel
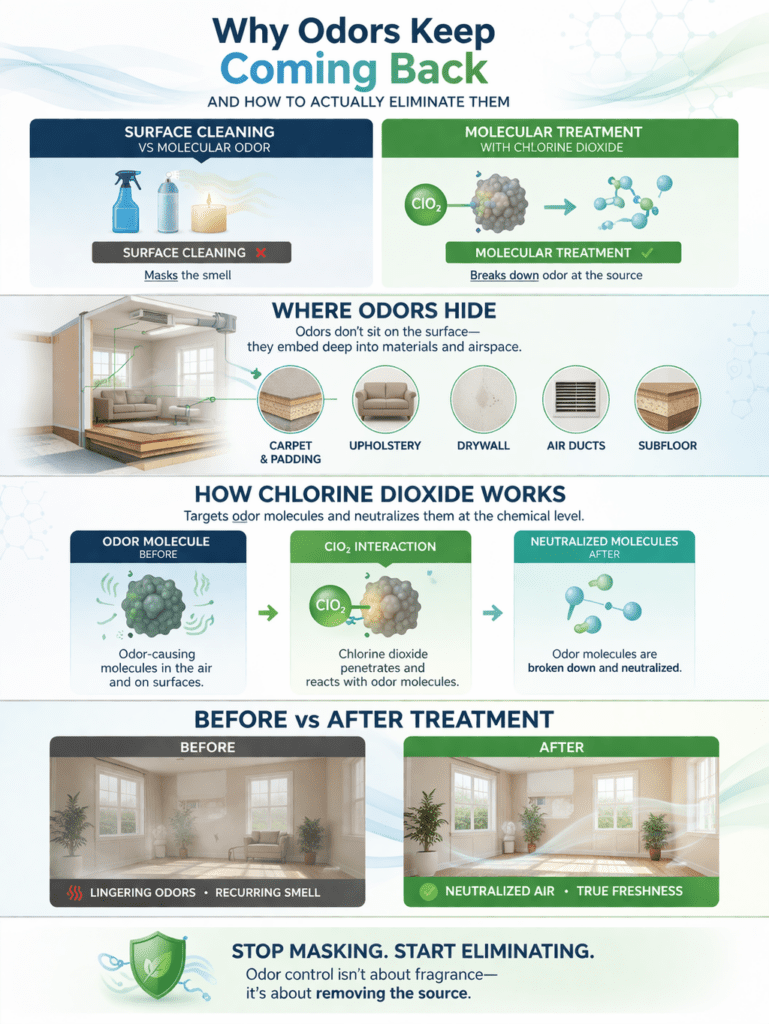
    infograph showing Understanding and neutralizing odor sources

    This is where chlorine dioxide tablets outperform traditional solutions:

    1. Whole-Room Odor Treatment

    Unlike sprays, the gas disperses evenly, reaching:

    • Airspace
    • Hidden corners
    • Porous materials

    2. Hard-to-Reach Areas

    Perfect for:

    • Closets
    • Crawl spaces
    • HVAC zones
    • Storage areas

    3. Persistent Odor Situations

    Ideal when odors:

    • Keep returning
    • Are embedded deep in materials
    • Haven’t responded to cleaning

    Is It Safe? Let’s Address the Big Question

    Let’s be direct—this is where people get cautious (and rightly so).

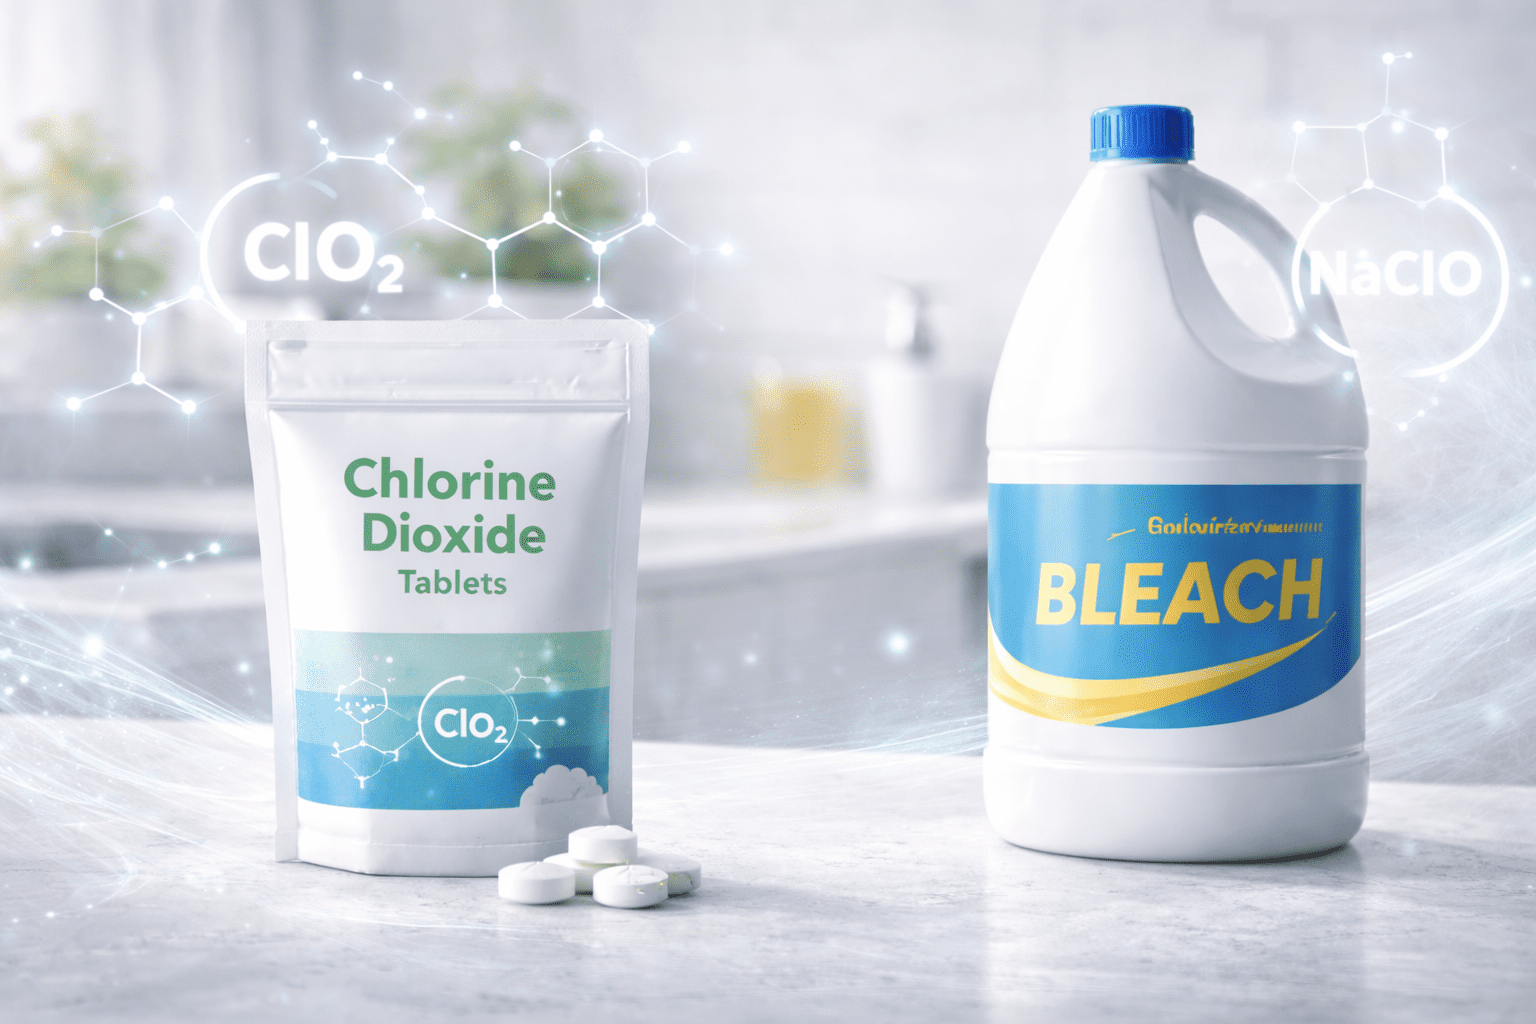
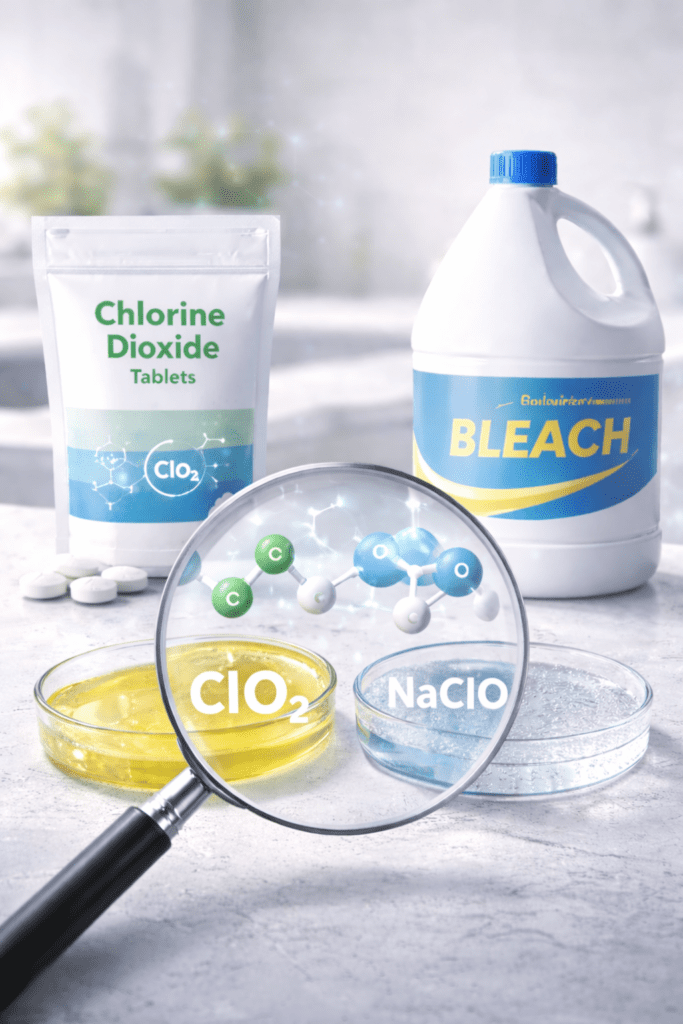
    Chlorine dioxide is not the same as chlorine bleach.
    They behave very differently.

    When used as directed in controlled-release applications:

    • It disperses at low, controlled levels
    • It does not accumulate like heavy chemical residues
    • It breaks down into simple compounds after use

    👉 The key is proper use and following instructions—just like any effective environmental treatment.


    Eco Considerations & Residue Profile

    One of the overlooked advantages:

    ✔ Leaves no heavy chemical residue
    ✔ Breaks down after treatment
    ✔ Does not rely on artificial fragrances
    ✔ Reduces the need for repeated product use

    This makes it a low-waste, high-efficiency solution compared to traditional odor masking products.


    Why This Matters Now More Than Ever

    Indoor environments are changing:

    • Homes are more tightly sealed than ever
    • Air circulation is reduced
    • People are spending more time indoors

    At the same time:

    • Sensitivity to indoor air quality is rising
    • Buyers and renters notice odor immediately
    • First impressions matter more than ever

    👉 Odor is no longer just a comfort issue—it’s a property value and livability issue


    Why Chlorine Dioxide Tablets Stand Out
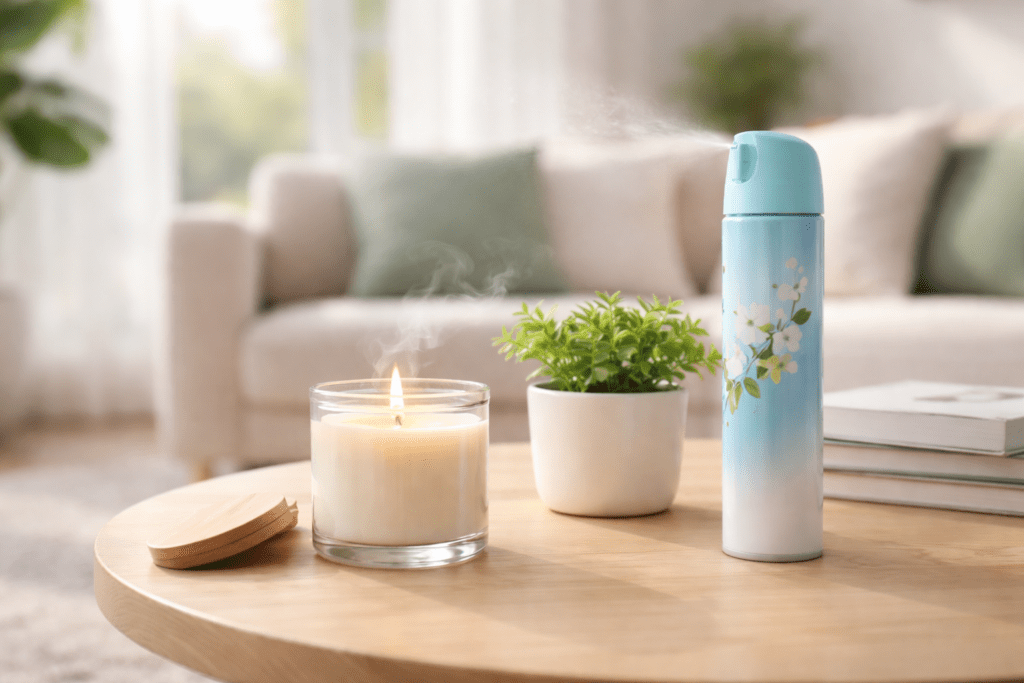
    Close-up of scented candle and air freshener on coffee table showing common odor masking products in home environment

    Let’s call it what it is:

    Most solutions treat the symptom.
    Chlorine dioxide targets the source.

    Traditional Methods:

    • Mask odors ❌
    • Short-term results ❌
    • Require constant reapplication ❌

    Chlorine Dioxide Approach:

    • Breaks down odor molecules ✔
    • Reaches hidden contamination ✔
    • Delivers longer-lasting results ✔

    Simple, Controlled Application

    One of the biggest advantages is ease of use.

    There’s no complicated system:

    • Place the tablet as directed
    • Allow controlled release over time
    • Let the environment be treated passively

    No spraying.
    No scrubbing.
    No guesswork.


    Final Thoughts: A Smarter Way to Treat Indoor Environments

    If your goal is:

    • A truly fresh indoor environment
    • Long-lasting odor elimination
    • A solution that works beyond the surface

    Then chlorine dioxide tablets offer something most products don’t:

    👉 A molecular-level solution to an invisible problem


    Call to Action

    If you’re tired of odors coming back no matter what you try, it may be time to stop masking the issue—and start eliminating it at the source.

    Explore how chlorine dioxide tablets can help you take control of your indoor environment with a smarter, more effective approach.

    (FAQs)

    1. What do chlorine dioxide tablets actually do?

    Chlorine dioxide tablets release a controlled amount of chlorine dioxide gas that interacts with odor-causing compounds in the air and on surfaces, breaking them down at the molecular level rather than masking them.


    2. Are chlorine dioxide tablets safe to use in homes?

    When used according to manufacturer instructions, chlorine dioxide tablets are designed for controlled environmental treatment. Proper use, ventilation guidance, and adherence to directions are essential for safe application.


    3. Do chlorine dioxide tablets remove odors permanently?

    They target and neutralize odor-causing molecules at the source, which can result in long-lasting odor elimination. However, results depend on the severity of the odor and whether the source has been fully addressed.


    4. What types of odors can chlorine dioxide eliminate?

    Chlorine dioxide is effective against a wide range of odors, including pet odors, smoke, musty smells, food odors, and odors caused by organic matter embedded in materials.


    5. How are chlorine dioxide tablets different from air fresheners?

    Air fresheners mask odors with fragrance, while chlorine dioxide tablets break down odor molecules chemically, eliminating the smell rather than covering it.


    6. Can chlorine dioxide reach hidden odor sources?

    Yes. As a gas, it disperses throughout enclosed spaces and can penetrate porous materials like carpets, fabrics, and wall surfaces where odor molecules often reside.


    7. How long does it take for chlorine dioxide to work?

    Treatment time varies depending on the size of the space and the intensity of the odor, but noticeable improvement often occurs within hours to a few days.


    8. Will chlorine dioxide leave any residue behind?

    No heavy residues are left behind. Chlorine dioxide breaks down into simple compounds after use, making it a clean treatment option compared to many traditional products.


    9. Can chlorine dioxide tablets help with musty or damp environments?

    Yes, they are commonly used in areas like basements, crawl spaces, and storage areas where musty odors develop due to moisture and limited airflow.


    10. Do I need to clean before using chlorine dioxide tablets?

    Basic cleaning is recommended, but chlorine dioxide tablets are designed to address odors embedded beyond surface level, making them effective even when traditional cleaning falls short.
  • What Causes Mold Pressure in Greenhouses and How Is It Reduced?

    What Causes Mold Pressure in Greenhouses and How Is It Reduced?

    Mold Pressure: The Invisible Environmental Load

    Growers often describe “fighting mold” as if it were a single outbreak.

    In reality, mold pressure is cumulative.

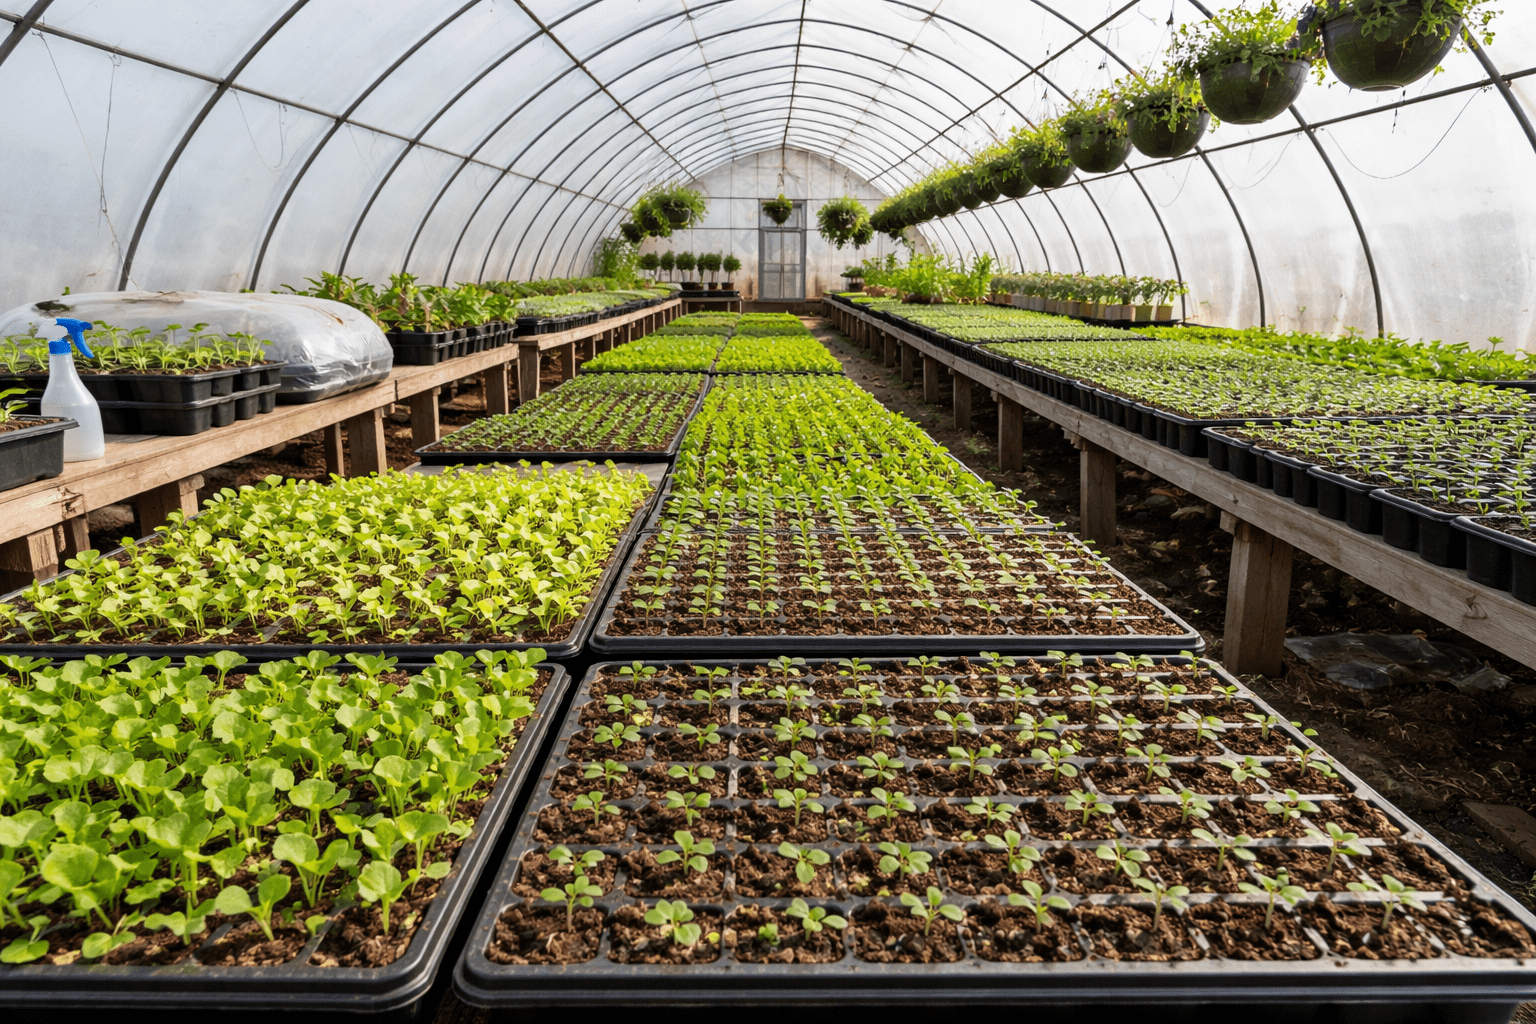
    Mold pressure refers to the overall concentration of spores, organic substrates, moisture conditions, and surface contamination that allow fungal growth to establish quickly in an enclosed environment.

    Greenhouses are engineered for plant amplification:

    • Warm temperatures
    • Elevated humidity
    • Frequent irrigation
    • Organic growing media
    • Enclosed air systems

    Those same conditions amplify microbial opportunity.

    The goal is not sterilization. The goal is load management.


    The Four Primary Drivers of Mold Pressure

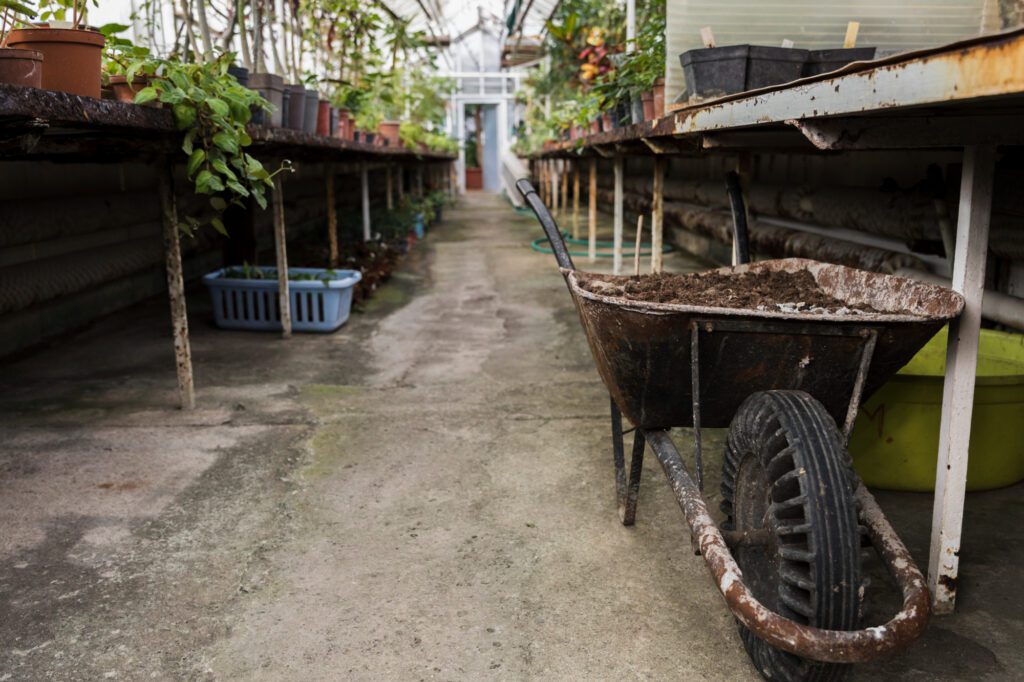
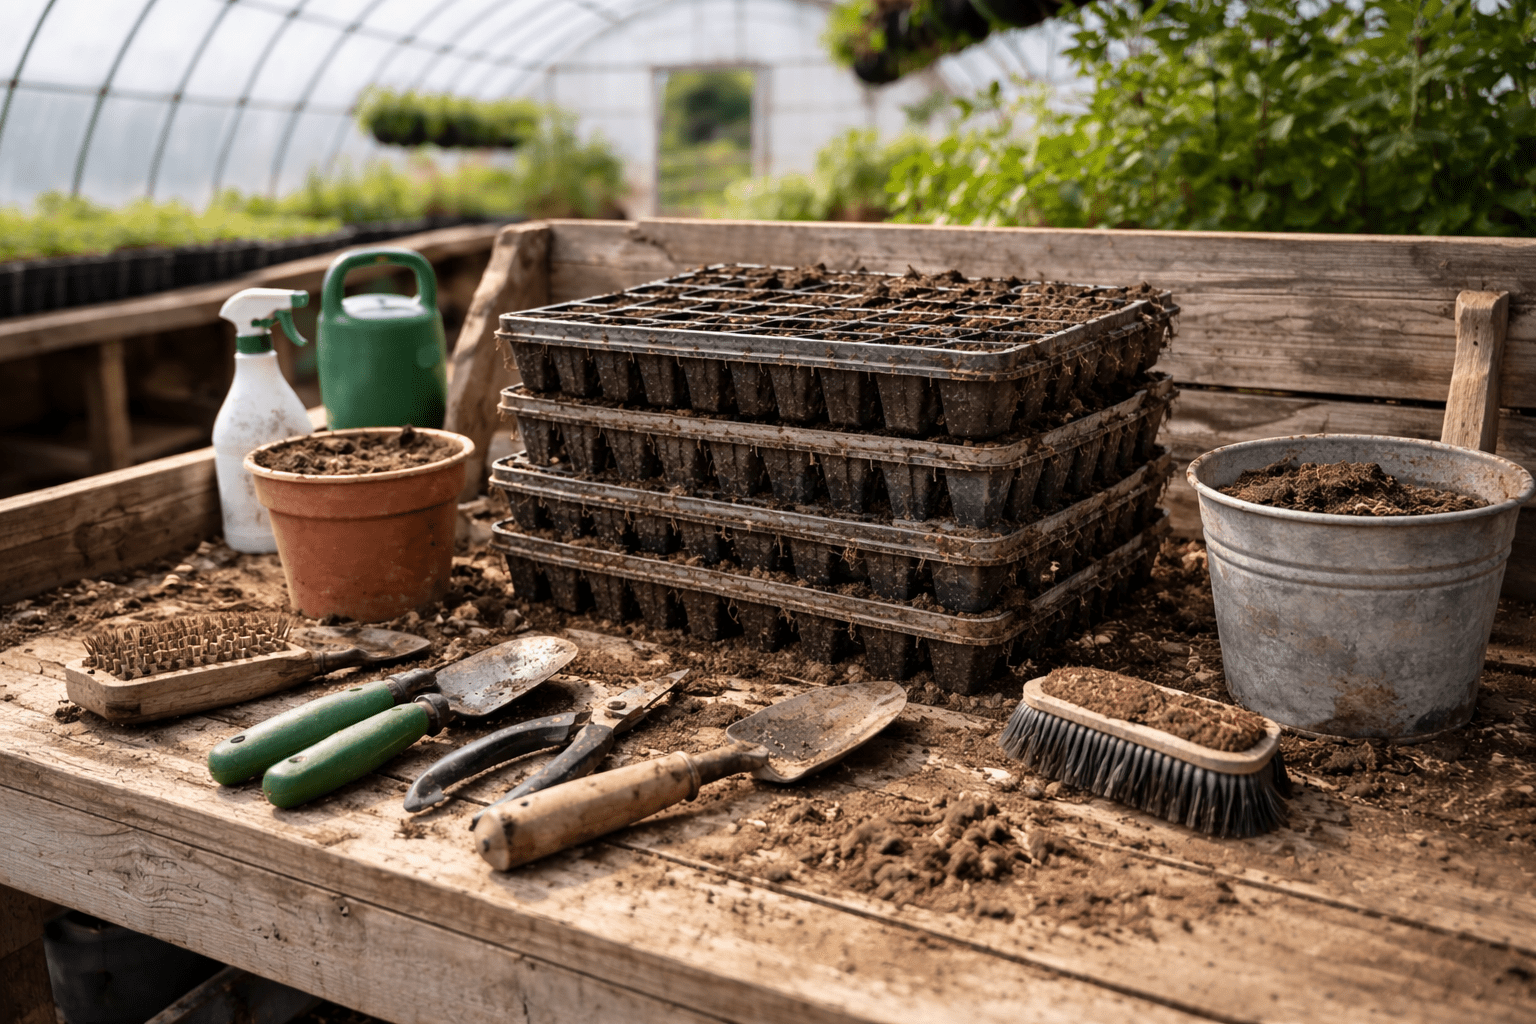
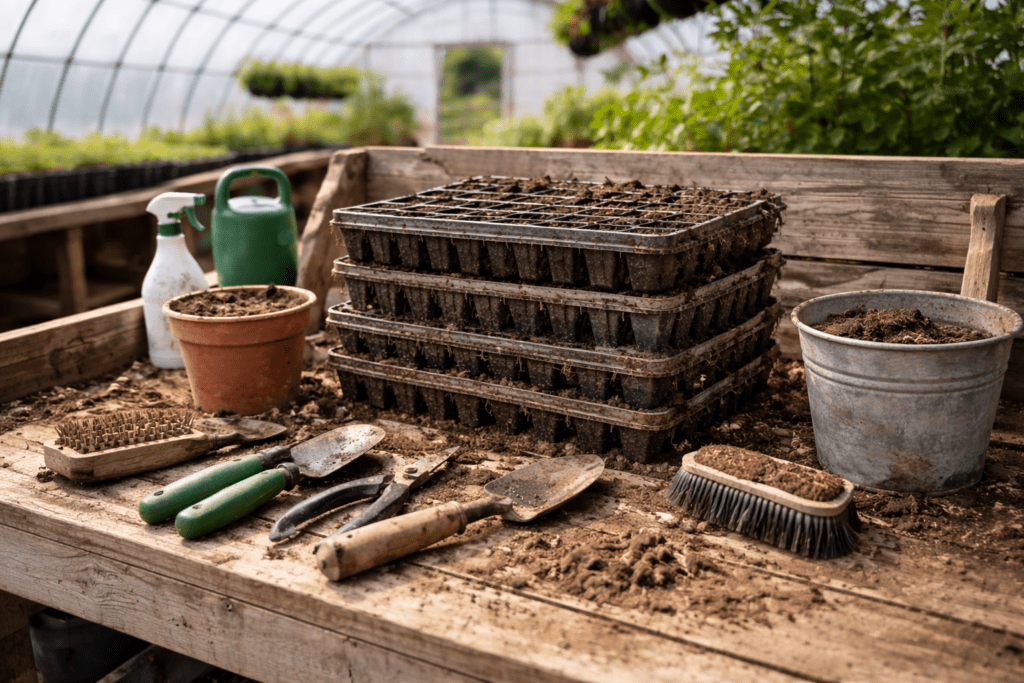
    Greenhouse potting bench with used propagation trays and contaminated gardening tools awaiting cleaning, highlighting greenhouse sanitation, biofilm risk, and seed tray hygiene between crop cycles.

    1. Persistent Humidity

    Relative humidity above 70% significantly increases fungal viability. Condensation on poly film, structural framing, and bench undersides creates microclimates where spores can germinate.

    Nighttime cooling followed by daytime heating creates repeated condensation cycles — ideal for fungal establishment.

    2. Organic Debris Accumulation

    Dead leaves, root fragments, spilled media, and algae buildup provide nutrient sources for mold.

    Organic debris under benches and along walkways is often overlooked.

    Spores do not need much.

    3. Biofilm in Irrigation Systems

    As discussed in hydroponic sanitation, biofilm acts as a microbial reservoir. When irrigation systems circulate water through contaminated lines, microbial load increases across the growing environment.

    Aerosolized droplets can distribute spores and bacteria.

    Water quality influences air quality.

    4. Cross-Contamination Between Crop Cycles

    Reusable trays, tools, benches, and containers carry microbial residues forward unless properly sanitized.

    Without a reset protocol, each crop cycle begins with elevated baseline pressure.

    Mold pressure compounds.

    Also Read🌱How Should You Sanitize a Greenhouse Before Seedling Season?


    Recognizing Elevated Mold Pressure Early

    Mold pressure does not always announce itself dramatically.

    Early indicators include:

    • Musty odors in enclosed areas
    • Algae growth on floors or troughs
    • Uneven seedling vigor
    • Increased damping-off incidence
    • Surface discoloration on benches or trays

    By the time visible mold appears on plants, environmental load has already been high for days or weeks.

    Prevention begins long before visible symptoms.


    Reducing Mold Pressure: A Structured Approach

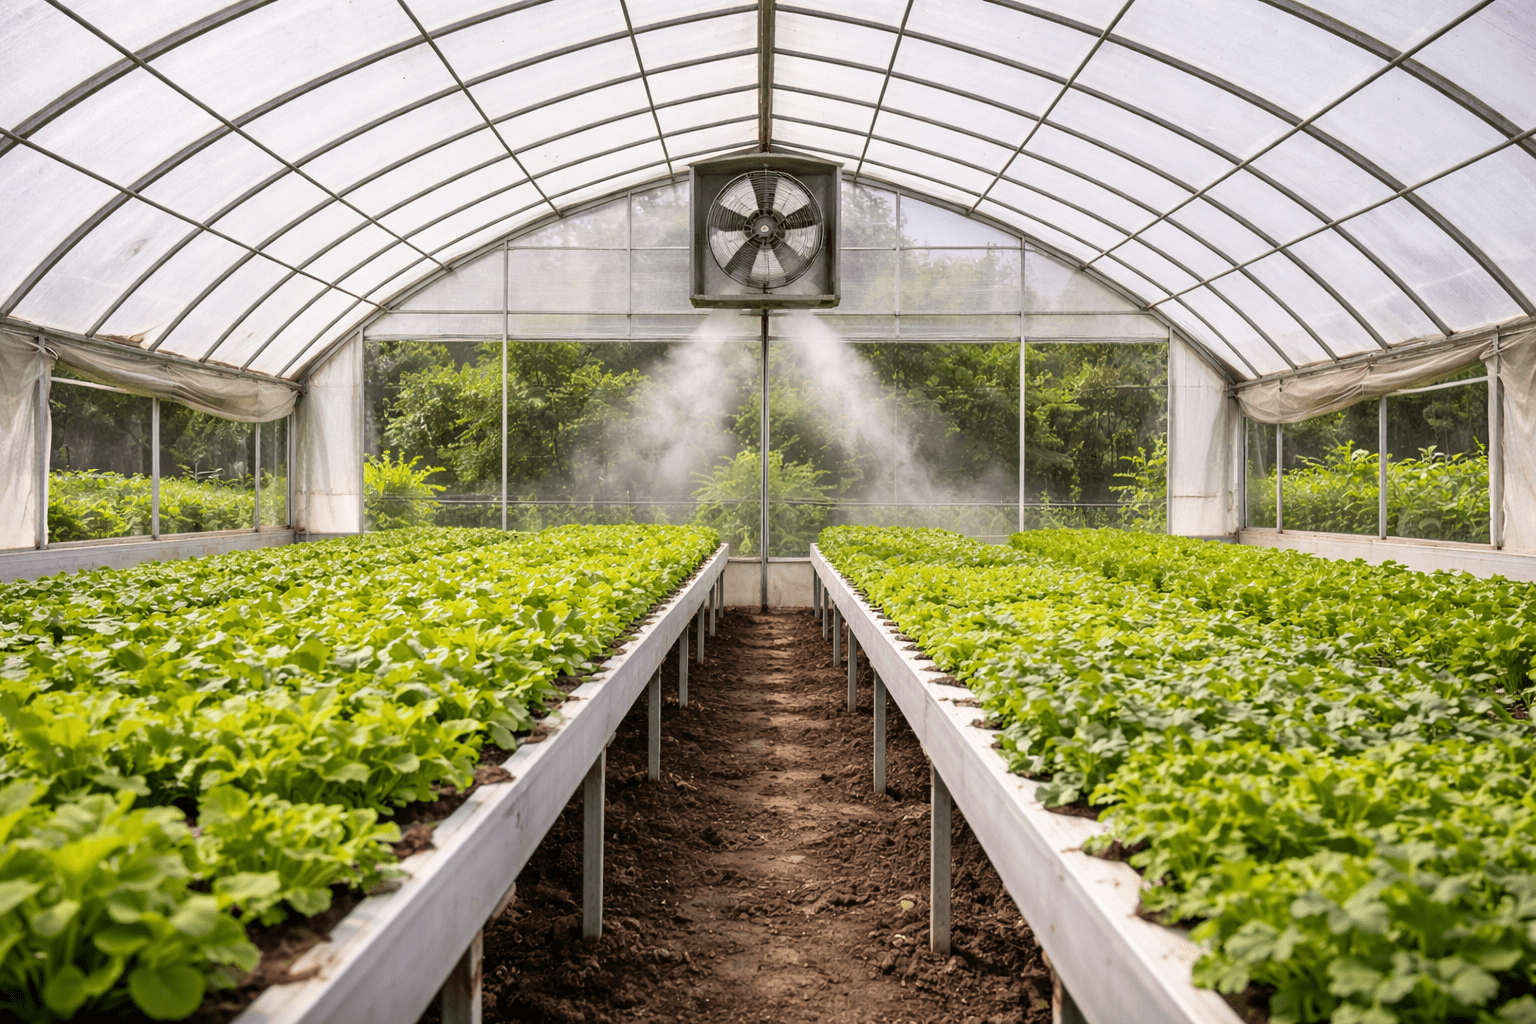
    physical debris removal reduced mold overload in greenhouses.

    Effective mold pressure reduction combines mechanical cleaning, sanitation, and environmental management.

    Step 1: Physical Cleaning

    • Remove organic debris
    • Sweep under benches
    • Scrub algae-prone areas
    • Drain and clean reservoirs

    Mechanical cleaning lowers nutrient availability for microbial growth.

    Step 2: Surface and Tray Sanitation

    Applying a properly diluted oxidizing sanitation solution to:

    • Benches
    • Tools
    • Reusable trays
    • Structural surfaces

    Chlorine dioxide (ClO₂), when used according to guidelines, functions as a selective oxidizer. It disrupts microbial cell walls and oxidizes organic residues without relying on hypochlorous acid chemistry or forming heavy chlorinated byproducts commonly associated with traditional chlorine.

    Residue management matters in enclosed environments.

    Step 3: Irrigation Line and System Hygiene

    Circulating an appropriate sanitation solution through drained systems between crop cycles reduces biofilm mass and microbial reservoirs.

    System-wide sanitation prevents recontamination of clean surfaces.

    Step 4: Airflow and Moisture Management

    • Increase horizontal airflow
    • Reduce condensation zones
    • Monitor relative humidity
    • Improve drainage

    Sanitation without airflow control is incomplete.

    Environmental consistency requires both.


    Mold Pressure and Controlled Environment Agriculture in 2026

    Controlled environment agriculture continues expanding globally. With that expansion comes:

    • Increased documentation of sanitation procedures
    • Greater attention to water quality
    • Integration of hygiene protocols into SOPs
    • More scrutiny of post-harvest and pre-harvest environments

    Small and mid-scale growers are adopting infrastructure hygiene strategies traditionally associated with larger operations.

    Mold pressure management is becoming part of operational discipline, not just reactive treatment.

    Infrastructure hygiene reduces variability.

    Also Read 🌱Proper CLO2 PPM for Safe & Effective Use In Agriculture


    Common Misconceptions About Mold in Greenhouses

    debris removal and clean evironment keeps mold overload under control.

    “If I don’t see mold, it’s not present.”
    Spores are microscopic and constantly circulating.

    “Bleach solves everything.”
    Surface disinfection without debris removal and system sanitation leaves microbial reservoirs intact.

    “It’s just part of greenhouse growing.”
    While some microbial presence is unavoidable, unmanaged mold pressure increases crop risk unnecessarily.

    The difference between normal microbial presence and elevated pressure is measurable in consistency.


    Conclusion: Mold Pressure Is Managed, Not Eliminated

    Greenhouses are dynamic ecosystems.

    Complete sterility is neither practical nor desirable. However, unmanaged microbial load leads to compounding environmental instability.

    By:

    • Removing organic debris
    • Sanitizing surfaces and trays
    • Cleaning irrigation systems
    • Managing humidity and airflow

    Growers reduce mold pressure and create a more stable growing environment.

    Mold pressure is not a single event. It is an environmental condition.

    Managing it requires structured sanitation and infrastructure awareness.

    Consistency grows where hygiene is intentional.


    (FAQs)

    1. What is mold pressure in a greenhouse?
    Mold pressure refers to the cumulative concentration of spores, organic material, humidity, and contamination that increase the likelihood of fungal growth.

    2. What causes mold to grow in greenhouses?
    High humidity, organic debris, poor airflow, and microbial buildup in irrigation systems contribute to mold development.

    3. Can irrigation systems increase mold pressure?
    Yes. Biofilm and contaminated water lines can act as microbial reservoirs.

    4. How do you reduce mold pressure before planting?
    Remove debris, sanitize surfaces and trays, clean irrigation systems, and manage humidity levels.

    5. Does sanitation eliminate all mold spores?
    No. Sanitation reduces microbial load but does not sterilize environments completely.

    6. Why is humidity control important in greenhouses?
    High humidity and condensation create favorable conditions for fungal growth.

    7. Should trays be sanitized between crop cycles?
    Yes. Reusable trays can carry contamination forward if not properly cleaned.

    8. Is chlorine dioxide used for greenhouse sanitation?
    Yes. Chlorine dioxide is used in agricultural sanitation due to its oxidizing properties.

    9. Can mold pressure affect seedling development?
    Elevated mold pressure increases the likelihood of damping-off and uneven growth.

    10. Is mold completely avoidable in greenhouse environments?
    No. Microbial presence is natural, but structured hygiene reduces excessive pressure.

  • How Do You Maintain Hygiene in Hydroponic Systems?

    How Do You Maintain Hygiene in Hydroponic Systems?

    The Invisible Layer Inside Every Irrigation System

    Hydroponic and irrigation systems appear clean from the outside. Clear tubing. Flowing water. Measured nutrients.

    Inside those lines, however, conditions are ideal for microbial growth.

    Warm nutrient solution + oxygen + dissolved organic matter = microbial opportunity.

    Over time, microorganisms attach to interior surfaces and form biofilm — a structured microbial community embedded in a protective matrix. Biofilm does not float freely in water. It adheres to surfaces and protects the organisms within it from environmental stress.

    Once established, biofilm can:

    • Reduce flow efficiency
    • Harbor bacteria and fungi
    • Contribute to odor formation
    • Interfere with nutrient consistency
    • Increase overall mold pressure in enclosed environments

    Hydroponic hygiene is not about water clarity. It is about system integrity.


    What Is Biofilm and Why Does It Matter?

    Biofilm forms when microorganisms attach to surfaces and begin producing extracellular polymeric substances — essentially a protective glue-like matrix.

    In hydroponic systems, this occurs inside:

    • Reservoir walls
    • Drip lines
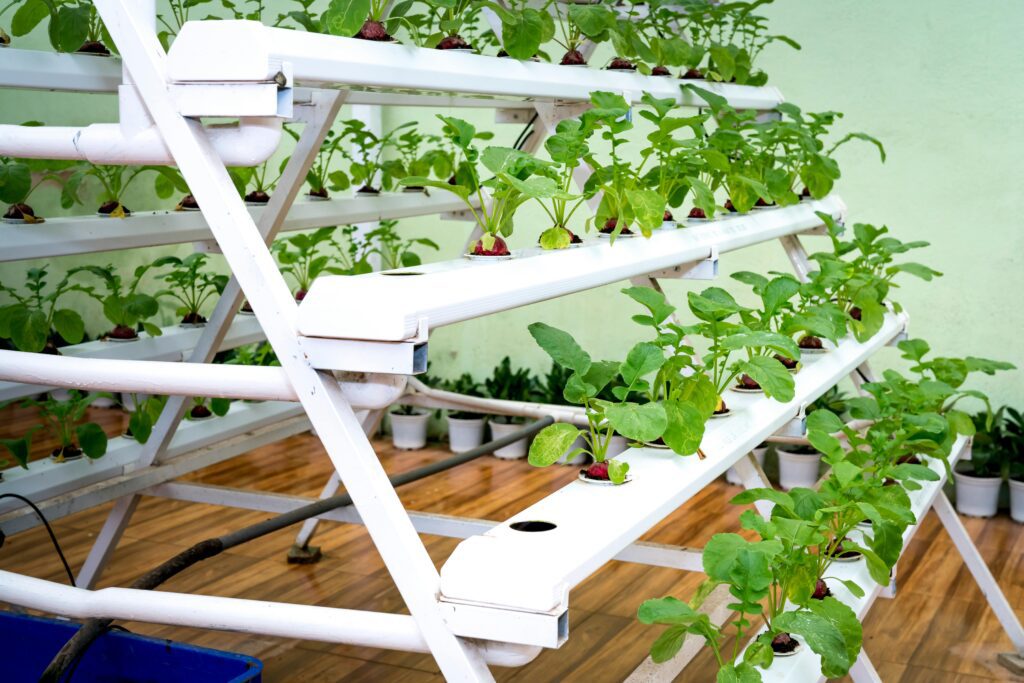
    • NFT channels
    • Emitters and misting heads
    • Return lines

    Once biofilm develops, it becomes more resistant to simple flushing.

    This matters because biofilm acts as a microbial reservoir. Even if water appears clean, biofilm can continually seed new microorganisms back into the system.

    Hydroponic sanitation is therefore not a one-time rinse. It is a controlled oxidation strategy.

    Also Read 🌱Biofilm Research & Odor Control: Breaking the Invisible Barriers with Chlorine Dioxide


    Signs Your Hydroponic System Needs Sanitation

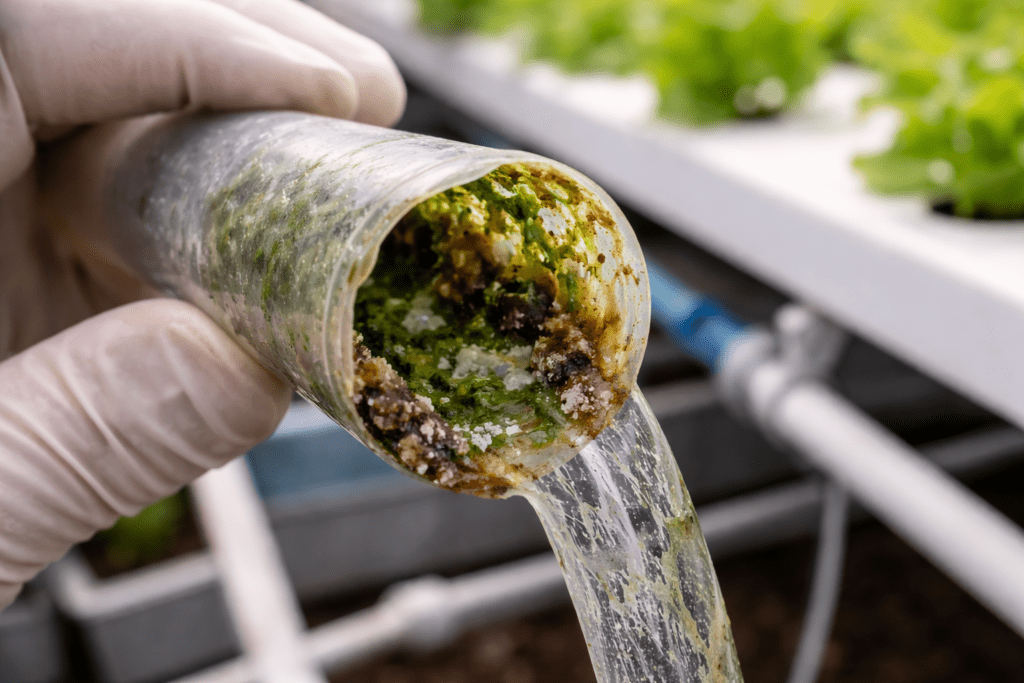
    Hydroponic tubing interior showing algae growth and biofilm accumulation, highlighting irrigation line sanitation, reservoir hygiene, and mold pressure control in controlled environment agriculture.

    Growers may notice subtle indicators before major problems occur:

    • Reduced or uneven emitter flow
    • Slime-like residue inside tubing
    • Musty or sour odors in reservoir areas
    • Cloudy nutrient solution
    • Inconsistent plant growth patterns

    These are not always dramatic failures. They are early indicators of increasing microbial load.

    In controlled environment agriculture, small inconsistencies compound over time.


    Cleaning vs. Sanitizing: A Critical Distinction

    Mechanical cleaning removes physical debris and sediment.

    Sanitizing reduces microbial load.

    For hydroponic systems, both are necessary.

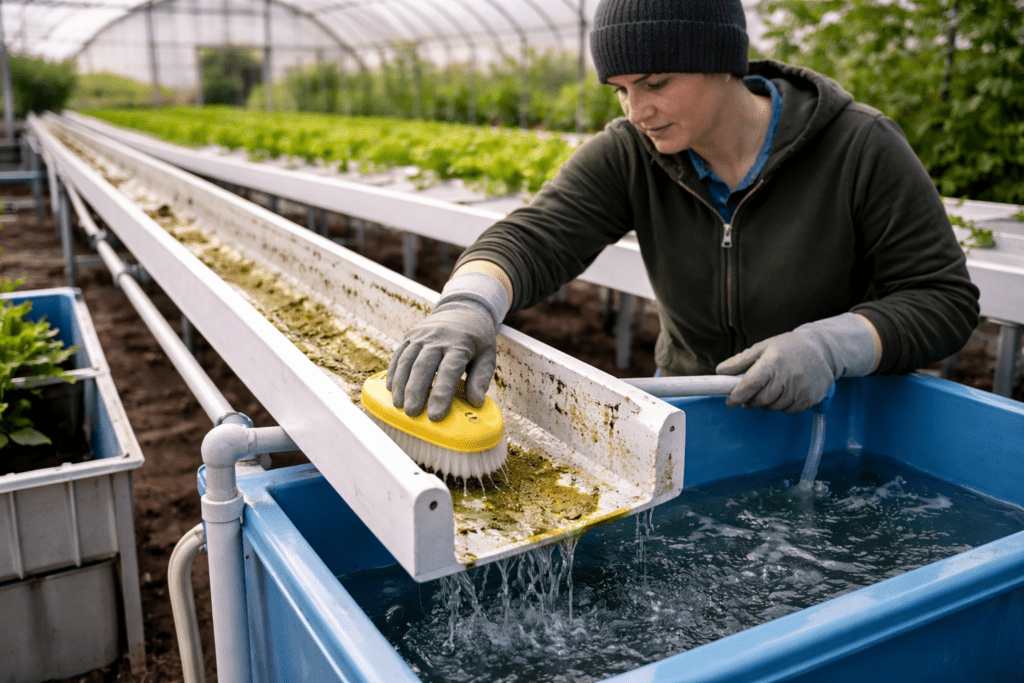
    Worker physically cleaning a drained hydroponic system with a brush, removing algae and biofilm to support hydroponic sanitation, reservoir hygiene, and mold pressure control in greenhouse production.

    Step 1: Drain and Physically Clean Reservoirs

    • Remove nutrient solution
    • Scrub interior surfaces
    • Remove sediment buildup
    • Inspect for mineral scaling

    Physical removal improves the effectiveness of sanitizing agents.

    Step 2: Flush Irrigation Lines

    Flushing lines with clean water removes loose debris but does not eliminate biofilm.

    Step 3: Apply an Oxidizing Sanitation Solution

    Oxidizing agents disrupt biofilm structure by breaking down organic compounds and damaging microbial cell walls.

    Chlorine dioxide (ClO₂) is widely used in water treatment because it:

    • Functions as a selective oxidizer
    • Penetrates biofilm layers
    • Does not rely on hypochlorous acid chemistry
    • Produces fewer chlorinated byproducts compared to traditional chlorine

    When properly diluted and circulated through irrigation systems between crop cycles, chlorine dioxide can help reduce biofilm mass and lower microbial pressure before new nutrient solutions are introduced.

    Always follow recommended dilution and application guidelines.


    Hydroponic Hygiene and Mold Pressure in Greenhouses

    Hydroponics has transformed modern agriculture. By growing plants in nutrient-rich water rather than soil, growers achieve faster growth, higher yields, and precise control over plant nutrition. 

    Greenhouses amplify moisture. When irrigation systems contribute to elevated microbial load, airborne spores and condensation zones compound the effect.

    In enclosed growing environments:

    • Evaporation increases ambient humidity
    • Aerosolized droplets can distribute microorganisms
    • Condensation surfaces provide new colonization points

    System sanitation therefore supports not just water quality, but overall greenhouse hygiene.

    Managing hydroponic biofilm is part of managing mold pressure.


    2026 and Beyond: Water Quality Scrutiny Is Increasing

    Agricultural water quality standards continue evolving in response to food safety expectations and controlled environment agriculture expansion.

    Growers — even small-scale operators — are increasingly:

    • Documenting sanitation procedures
    • Monitoring water quality metrics
    • Integrating system flush protocols into SOPs
    • Seeking sanitation solutions with lower residue profiles

    Hydroponic hygiene is shifting from reactive troubleshooting to proactive infrastructure management.

    Sanitation planning between crop cycles is becoming operational best practice.


    Common Mistakes in Hydroponic Sanitation

    Even experienced growers can undermine system hygiene by:

    • Only treating reservoirs but not lines
    • Ignoring return lines
    • Using incorrect dilution ratios
    • Skipping contact time
    • Reintroducing nutrients immediately without proper flushing

    Hydroponic sanitation works best when applied systematically across the entire water pathway.

    Partial cleaning leaves microbial strongholds intact.

    Also Read 🌱Hydroponics with ClO₂ — Cleaner Water, Healthier Crops


    Conclusion: Clean Water Pathways Support Consistent Growth

    Hydroponic systems deliver life directly to plant roots. That delivery system deserves structured hygiene attention.

    Biofilm development is natural. Left unmanaged, it becomes a source of microbial instability and operational inconsistency.

    Draining, cleaning, flushing, and applying properly diluted oxidizing solutions between crop cycles reduces microbial load and supports cleaner infrastructure.

    In controlled environment agriculture, invisible systems often matter most.

    Hydroponic hygiene is not an emergency response. It is part of building a more consistent growing operation.


    (FAQs)

    1. What is biofilm in a hydroponic system?
    Biofilm is a structured microbial community that attaches to surfaces inside reservoirs and irrigation lines.

    2. Why do hydroponic systems develop slime buildup?
    Slime buildup is often a sign of biofilm formation caused by microorganisms feeding on dissolved organic material.

    3. How often should hydroponic systems be sanitized?
    Sanitation is commonly performed between crop cycles and whenever microbial buildup is suspected.

    4. Can biofilm affect plant growth?
    Yes. Biofilm can interfere with nutrient delivery consistency and increase microbial pressure.

    5. Is flushing with water enough to clean irrigation lines?
    No. Water flushing removes debris but does not eliminate established biofilm.

    6. Is chlorine dioxide used for water sanitation?
    Yes. Chlorine dioxide is widely used in municipal and agricultural water treatment applications.

    7. What causes odor in hydroponic reservoirs?
    Odor often results from microbial growth and organic decomposition within the system.

    8. Does sanitation remove all microorganisms?
    No. Sanitation reduces microbial load but does not sterilize systems completely.

    9. Should irrigation lines be cleaned between crops?
    Yes. Cleaning between crop cycles reduces cross-contamination and buildup.

    10. Can poor system hygiene increase mold pressure in greenhouses?
    Yes. Elevated microbial load in irrigation systems can contribute to overall environmental mold pressure.

  • Why Is Seed Tray Cleaning Critical for Early Crop Success?

    Why Is Seed Tray Cleaning Critical for Early Crop Success?

    The Hidden Risk in Reusing Seed Trays

    Reusable seed trays are standard practice for small farms, greenhouses, homesteaders, and controlled environment growers. They are efficient, economical, and sustainable.

    They are also one of the most overlooked sources of early crop failure.

    Propagation trays retain:

    • Root fragments embedded in plastic cells
    • Dried organic matter
    • Mineral deposits from irrigation
    • Residual biofilm layers
    • Dormant fungal spores

    When trays are reused without proper sanitation, microbial populations from previous crop cycles carry forward into the most vulnerable stage of plant development.

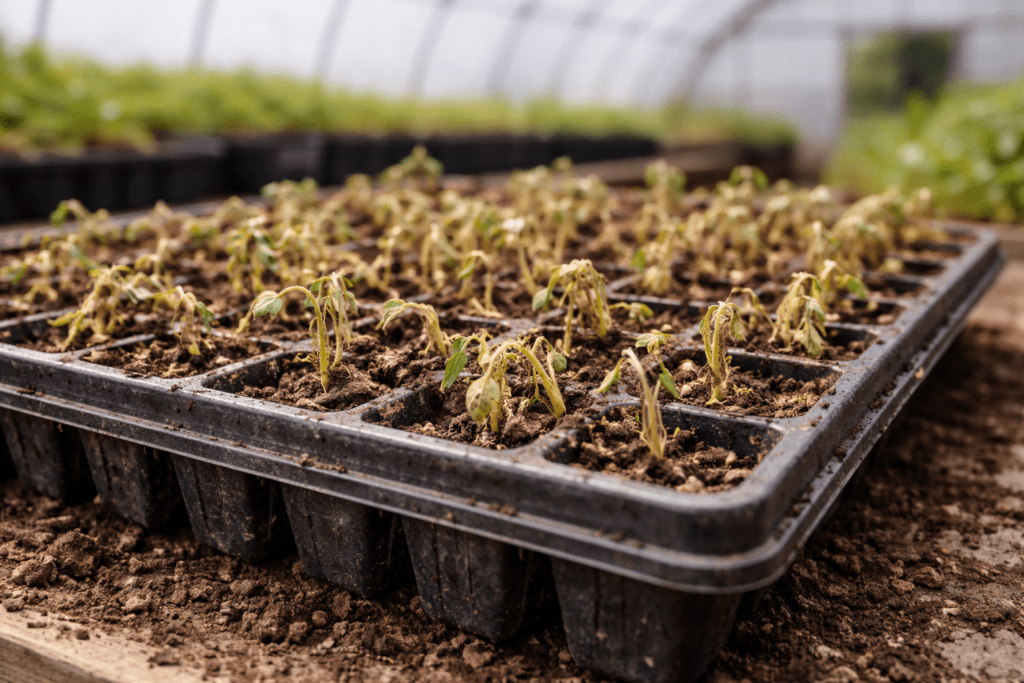
    Seedlings do not fail dramatically. They fail quietly — uneven germination, thinning stems, damping-off at soil line, patchy trays.

    By the time symptoms appear, the contamination occurred days earlier.


    Understanding Damping-Off and Microbial Load

    Damping-off is commonly associated with fungal organisms such as Pythium and Rhizoctonia species. These organisms thrive in:

    • High humidity
    • Saturated media
    • Organic debris
    • Poor airflow

    Propagation trays create ideal micro-environments for these conditions. When trays contain residual contamination, microbial load increases before seedlings even emerge.

    “Microbial load” refers to the total concentration of microorganisms present on a surface. Reducing that baseline load before planting reduces the probability of early-stage disease pressure.

    Sanitation is not about eliminating all microbes. It is about lowering the environmental threshold that allows opportunistic pathogens to dominate.

    Also Read 🌱How Should You Sanitize a Greenhouse Before Seedling Season?


    Why Rinsing Is Not Enough

    Many growers rinse trays with water and consider them clean.

    Water removes visible soil. It does not remove:

    • Embedded spores
    • Biofilm layers
    • Oxidizable organic residues
    • Microbial colonies protected in plastic pores

    Biofilm is particularly persistent. It forms when microorganisms attach to surfaces and produce a protective matrix. Once established, biofilm resists simple rinsing and can reduce the effectiveness of future sanitation attempts.

    Mechanical cleaning must come first.


    Step-by-Step Seed Tray Cleaning Protocol

    A structured approach to seed tray sanitation improves consistency between crop cycles.

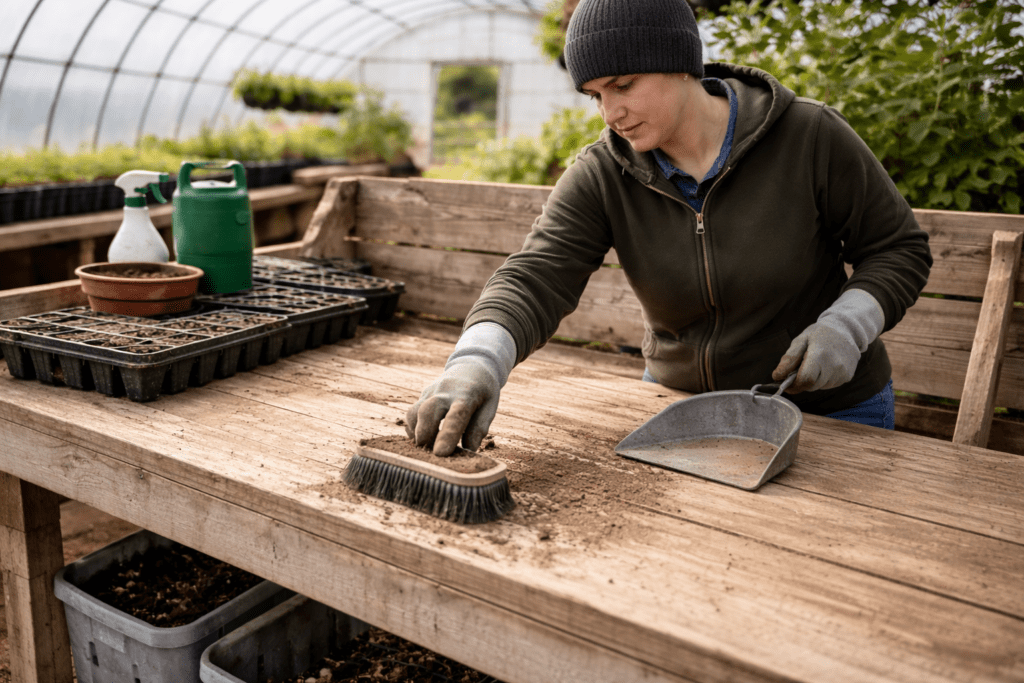
    Greenhouse worker removing dirt and organic debris from a potting bench prior to greenhouse sanitation, supporting seed tray hygiene and mold pressure reduction.

    Step 1: Remove Debris

    • Shake out residual soil
    • Physically scrub trays with a brush
    • Rinse with water to remove loose material

    Mechanical friction disrupts organic buildup and improves disinfectant contact.

    Step 2: Apply a Properly Diluted Sanitizing Solution

    After debris removal, trays can be:

    • Sprayed thoroughly
    • Soaked for appropriate contact time
    • Allowed to air dry completely

    An oxidizing sanitation solution, such as properly diluted chlorine dioxide, works by disrupting microbial cell walls and oxidizing organic residues without forming heavy chlorinated byproducts.

    Unlike traditional bleach-based approaches, chlorine dioxide does not rely on hypochlorous acid chemistry and produces fewer persistent residues when used correctly.

    For enclosed propagation environments, residue control matters.

    Step 3: Complete Drying

    Drying is frequently skipped.

    Moisture remaining in tray cells can allow microbial rebound. Allowing trays to dry fully before filling with media reduces the chance of immediate recolonization.

    This final step is a stability control measure.


    Seed Tray Hygiene and Operational Consistency

    For commercial growers and small-scale farmers alike, early-stage crop losses carry disproportionate impact.

    Propagation setbacks mean:

    • Delayed transplant schedules
    • Uneven crop maturity
    • Lost bench space
    • Increased labor costs

    In controlled environment agriculture, sanitation protocols are increasingly integrated into Standard Operating Procedures (SOPs).

    By 2026 and beyond, small and mid-scale growers are adopting structured hygiene documentation similar to larger commercial facilities. Food safety compliance expectations and water quality oversight continue to expand in certain agricultural sectors.

    Tray sanitation is becoming operational best practice rather than optional cleaning.


    The Role of Chlorine Dioxide in Propagation Hygiene

    Chlorine dioxide (ClO₂) is used globally in agricultural water treatment, produce processing, and infrastructure sanitation due to its selective oxidizing properties.

    For seed tray applications, chlorine dioxide tablets allow growers to mix controlled concentrations for:

    • Tray soaking between cycles
    • Surface spraying
    • Tool sanitation
    • Humidity dome treatment

    When used according to dilution guidelines, chlorine dioxide breaks down into inert salts and does not leave heavy residues on plastic surfaces.

    For growers seeking consistent sanitation without persistent chemical films, oxidizing solutions offer a balanced approach.

    Also Read 🌱Hydroponics with ClO₂ — Cleaner Water, Healthier Crops


    Common Mistakes in Seed Tray Sanitation

    Greenhouse propagation tray with wilting, browning seedlings showing signs of damping-off and elevated mold pressure due to inadequate seed tray cleaning and sanitation.

    Even growers who sanitize may encounter recurring issues due to:

    • Skipping mechanical cleaning
    • Using improper dilution ratios
    • Insufficient contact time
    • Reusing trays while still damp
    • Ignoring tool and bench cross-contamination

    Propagation hygiene works best as a system — trays, benches, tools, and irrigation components should align in sanitation timing.

    Isolated cleaning rarely solves recurring pressure.


    Conclusion: Strong Starts Begin with Clean Infrastructure

    Seedlings are biologically vulnerable. They rely on stable environmental conditions during their earliest growth phase.

    Reusing trays without proper sanitation increases microbial load and introduces preventable variability into propagation systems.

    Structured seed tray cleaning reduces cross-cycle contamination, lowers mold pressure, and supports more consistent germination and early development.

    Clean trays do not guarantee perfect crops — but they remove one of the most controllable risk factors in early-stage production.

    In greenhouse management, consistency compounds. Seed tray sanitation is one of the simplest places to start.


    (FAQs)

    1. Why should seed trays be sanitized between crops?
    Reusable trays can retain organic debris and microbial contamination that increase disease pressure in new seedlings.

    2. What causes damping-off in seedlings?
    Damping-off is typically caused by soilborne fungi that thrive in moist, organic-rich environments.

    3. Is rinsing seed trays enough before reuse?
    No. Rinsing removes visible debris but does not eliminate embedded spores or biofilm.

    4. How long should trays soak in a sanitizing solution?
    Contact time depends on the product and concentration used. Always follow dilution and application guidelines.

    5. Can biofilm form on plastic seed trays?
    Yes. Biofilm can develop on plastic surfaces and protect microorganisms from simple rinsing.

    6. Is chlorine dioxide used in agriculture?
    Yes. Chlorine dioxide is widely used for water treatment and surface sanitation in agricultural and food production settings.

    7. Should seed trays be completely dry before planting?
    Allowing trays to dry reduces the likelihood of immediate microbial regrowth before media is added.

    8. How often should propagation equipment be sanitized?
    Sanitation is recommended between crop cycles and whenever contamination is suspected.

    9. Does sanitation guarantee disease-free seedlings?
    No. Sanitation reduces risk but does not eliminate all biological variables.

    10. Can poor tray hygiene affect germination rates?
    Yes. Elevated microbial load can contribute to uneven germination and early seedling stress.

  • How Should You Sanitize a Greenhouse Before Seedling Season?

    How Should You Sanitize a Greenhouse Before Seedling Season?

    Why Pre-Season Greenhouse Sanitation Matters More Than Most Growers Realize

    Early spring brings rising humidity, increased irrigation cycles, and enclosed warmth — ideal conditions for seedlings and for microbial buildup. During winter downtime, organic debris, algae films, dormant spores, and biofilm residues quietly accumulate on benches, walls, trays, and irrigation lines.

    When temperatures rise, those residues become active.

    Greenhouse sanitation is not simply cosmetic cleaning. It is environmental load management. Every enclosed growing structure — high tunnels, poly greenhouses, grow rooms, propagation houses — creates a controlled microclimate. That control works both ways. Moisture stays in. Air stagnation zones form. Condensation develops on poly film and structural framing.

    Without a pre-season reset, growers start the year with elevated microbial pressure already present.


    Understanding Mold Pressure in Enclosed Growing Environments

    “Mold pressure” refers to the overall concentration of mold spores and organic substrates that allow fungal growth to establish quickly. It is not about one visible outbreak. It is about environmental readiness for microbial expansion.

    Greenhouses create three ideal conditions for mold development:

    • Persistent moisture
    • Organic debris accumulation
    • Limited air exchange zones

    Overwintered plant residue under benches, algae buildup on floors, and residue in irrigation lines create nutrient sources. When seedlings are introduced, the microbial ecosystem is already active.

    Sanitation before seedling season lowers that baseline pressure.

    Also Read 🌱Proper CLO2 PPM for Safe & Effective Use In Agriculture


    Step 1: Remove Organic Residue Before Disinfection

    Disinfection without cleaning is ineffective. Organic matter neutralizes many sanitizing agents and shields microorganisms.

    Before applying any sanitizing solution:

    • Remove old plant material and growing media debris
    • Sweep and vacuum benches and structural ledges
    • Scrub algae from floors and low walls
    • Flush out sediment from drainage areas

    Mechanical cleaning reduces the organic load. Sanitation solutions work best on physically clean surfaces.

    This is infrastructure maintenance, not just hygiene.


    Step 2: Sanitize Benches, Walls, and Structural Surfaces

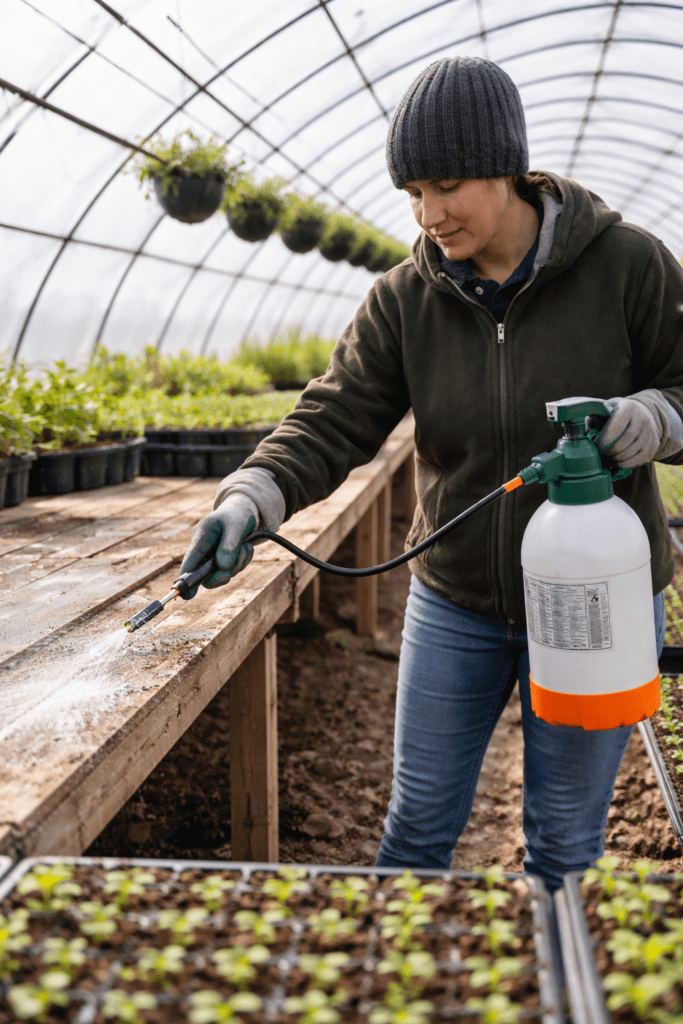
    Greenhouse worker applying sanitizing solution with a pump sprayer to benches and work surfaces, supporting greenhouse sanitation and mold pressure reduction.

    Benches and work surfaces are high-contact zones for trays and tools. Poly film walls and framing collect condensation droplets that can harbor spores.

    Key areas to address:

    • Propagation benches
    • Tool staging areas
    • Door handles and carts
    • Structural supports where condensation forms

    An oxidizing sanitation approach can help reduce residual biofilm and organic buildup without leaving heavy chemical residues. Chlorine dioxide, when properly diluted and applied, functions as a selective oxidizer that disrupts microbial cell walls while breaking down organic odor-causing compounds.

    Unlike traditional chlorine bleach, chlorine dioxide does not rely primarily on hypochlorous acid chemistry and does not form the same chlorinated byproducts. For enclosed spaces, residue control and ventilation considerations matter.


    Step 3: Address Seed Trays and Propagation Equipment

    Reusable seed trays are common sources of cross-cycle contamination.

    Plug trays and humidity domes often retain:

    • Root fragments
    • Biofilm residues
    • Mineral scale
    • Fungal spores embedded in plastic pores

    Proper seed tray cleaning involves:

    1. Physical washing to remove media debris
    2. Soaking or spraying with a properly diluted sanitizing solution
    3. Complete drying before reuse

    Drying is often overlooked. Residual moisture allows microbial rebound before seeds are even planted.

    For small farmers and homesteaders, tray sanitation can significantly reduce early-stage losses linked to damping-off organisms.


    Step 4: Sanitize Irrigation Components and Reservoirs

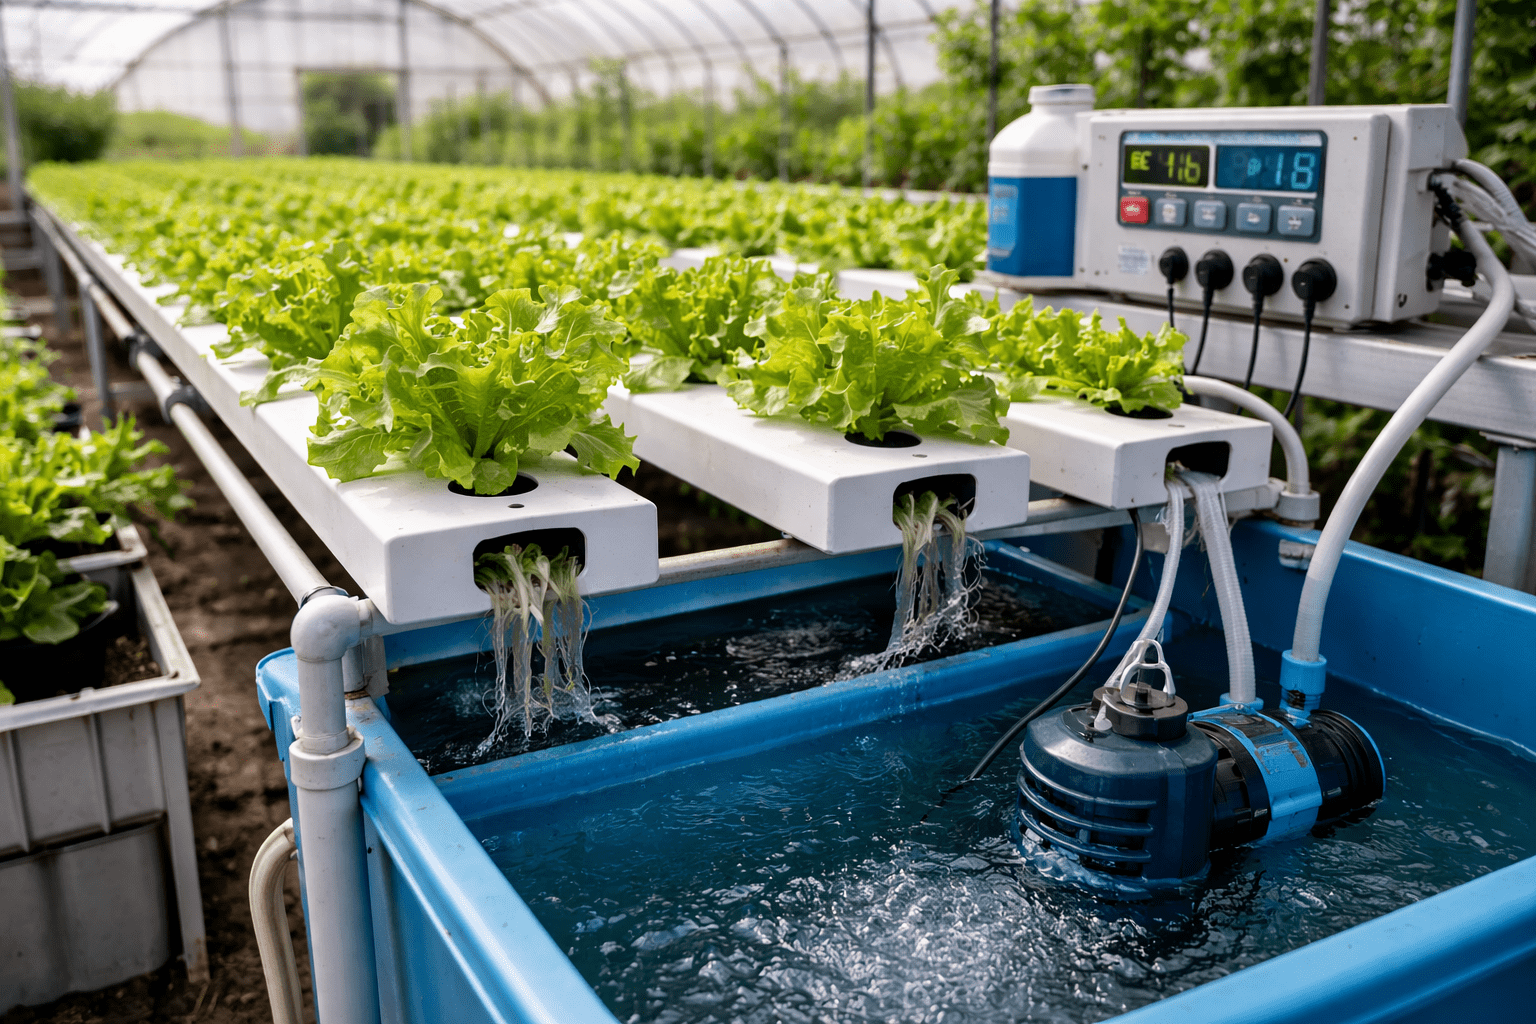
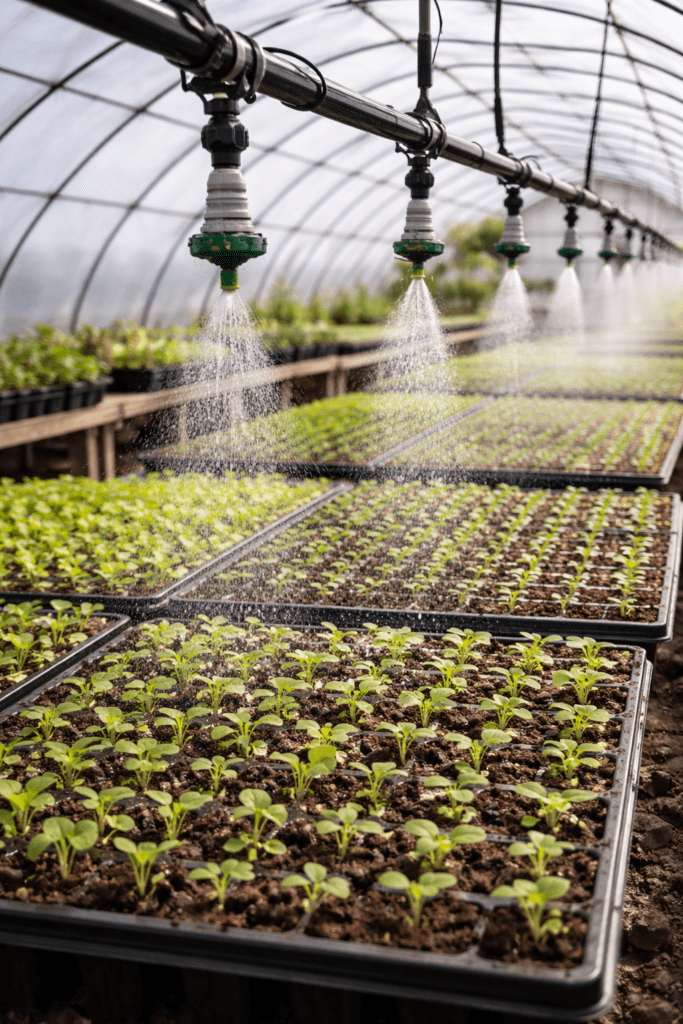
    Greenhouse overhead irrigation system watering seedling trays, illustrating hydroponic system sanitation and moisture management in controlled environment agriculture.


    Irrigation systems are frequently ignored during pre-season cleaning. Drip emitters, misting lines, reservoirs, and hydroponic channels can accumulate biofilm — a structured microbial community embedded in a protective matrix.

    Biofilm:

    • Reduces flow efficiency
    • Harbors bacteria and fungi
    • Contributes to odor formation
    • Interferes with nutrient delivery consistency

    Flushing irrigation lines with an appropriate oxidizing solution before nutrient introduction can help remove organic buildup and reduce biofilm mass.

    This step supports long-term system performance, not just sanitation.

    Also Read 🌱Hydroponics with ClO₂ — Cleaner Water, Healthier Crops


    The Role of Chlorine Dioxide in Greenhouse Sanitation

    Chlorine dioxide (ClO₂) is a dissolved gas used globally for water treatment, food processing sanitation, and infrastructure hygiene. As an oxidizer, it disrupts microbial cells without functioning as a traditional chlorinating agent.

    For greenhouse applications, chlorine dioxide tablets allow controlled mixing for:

    • Surface sanitation
    • Tray soaking
    • Irrigation line flushing
    • Odor management in enclosed grow rooms

    When used according to proper dilution guidelines, chlorine dioxide breaks down into inert salts and does not leave heavy residues on treated surfaces.

    In 2026 and beyond, growers are increasingly prioritizing sanitation solutions that balance microbial control with residue awareness and environmental compatibility.


    Future-Proofing Greenhouse Sanitation Practices

    Controlled environment agriculture is expanding rapidly. Indoor farming, hydroponic systems, and high-efficiency greenhouse operations require consistent infrastructure hygiene.

    Emerging trends include:

    • Increased regulatory attention to water quality in produce operations
    • Greater scrutiny of sanitation documentation in commercial farms
    • Adoption of oxidizing technologies that reduce byproduct formation
    • Integrated hygiene planning between crop cycles

    Pre-season sanitation will continue shifting from “optional cleaning” to standardized operational protocol.

    Small growers who adopt structured sanitation routines now build more consistent growing systems over time.


    Conclusion: Start Clean, Grow Consistent

    Greenhouses are designed to amplify plant growth. They also amplify moisture and microbial activity.

    A structured sanitation reset before seedling season reduces mold pressure, removes organic residue, and supports cleaner infrastructure. From benches and trays to irrigation lines and reservoirs, every surface contributes to the microbial baseline of the growing environment.

    Starting the season clean does not guarantee perfect crops — agriculture is never that simple. But it improves environmental consistency and reduces avoidable pressure points.

    Greenhouse sanitation is not about reacting to outbreaks. It is about building a more manageable growing space from the beginning of the season.


    (FAQs)

    1. What is greenhouse sanitation?
    Greenhouse sanitation is the process of cleaning and disinfecting surfaces, tools, trays, and irrigation systems to reduce microbial buildup and organic residue before and during crop cycles.

    2. Why is pre-season greenhouse cleaning important?
    Pre-season cleaning lowers mold pressure and removes overwintered debris that can contribute to early crop losses.

    3. How often should a greenhouse be sanitized?
    A full sanitation reset is recommended between crop cycles, with ongoing maintenance cleaning during active growing periods.

    4. What causes mold pressure in greenhouses?
    Persistent humidity, organic debris, and limited airflow create conditions that allow mold spores to multiply rapidly.

    5. Can irrigation lines harbor bacteria and fungi?
    Yes. Biofilm can form inside irrigation lines and reservoirs, reducing efficiency and increasing microbial load.

    6. Is chlorine dioxide safe for greenhouse sanitation?
    When properly diluted and applied according to guidelines, chlorine dioxide is used globally for water and surface sanitation in agricultural settings.

    7. Do seed trays need to be sanitized every season?
    Reusable trays should be cleaned and sanitized between crop cycles to reduce cross-contamination.

    8. Does bleach work for greenhouse sanitation?
    Bleach can disinfect surfaces but may leave residues and form byproducts. Some growers prefer oxidizing alternatives that reduce residue concerns.

    9. What is biofilm in irrigation systems?
    Biofilm is a structured microbial community that adheres to surfaces and protects microorganisms from environmental stress.

    10. Can sanitation improve crop consistency?
    Reducing microbial load and organic residue supports more consistent growing conditions, though sanitation alone does not eliminate all crop risks.

  • What Makes Some Residues Harder to Reach Than Others?

    What Makes Some Residues Harder to Reach Than Others?

    Cleaning Isn’t Just About Contact

    Most people think cleaning works like this:

    Cleaner touches surface → surface changes.

    In reality, there’s an invisible step in between:
    movement.

    Before any chemical interaction happens, molecules must travel—through air, moisture, thin surface films, and microscopic spaces we never see. Whether they can do that efficiently depends on three quiet factors:

    • Molecular size
    • Solubility
    • How they behave in thin layers of moisture

    Once you understand those, a lot of everyday cleaning frustrations suddenly make sense.


    The Invisible Landscape on “Dry” Surfaces

    Even surfaces that look dry usually aren’t.

    Most household surfaces hold:

    • Thin moisture films
    • Microscopic residue layers
    • Organic material embedded in pores or texture

    These layers can be thinner than a human hair, but they still act like terrain. Some molecules move across that terrain easily. Others struggle.

    That’s why scrubbing harder doesn’t always solve the problem. Force doesn’t change molecular traffic.


    Molecular Size: Why Small Often Moves Differently

    At the molecular level, size influences mobility.

    Smaller or more neutrally structured molecules can:

    • Slip through thin moisture layers more easily
    • Reach trapped residues
    • Interact without piling up on the surface

    Larger or highly reactive compounds may:

    • React quickly at the surface
    • Leave behind secondary material
    • Have limited movement once they bind

    This isn’t about “strength.”
    It’s about access.

    Also Read 👉🏻What Are Biofilms, and Why Do They Form on Everyday Surfaces?


    Solubility: Water Changes Everything

    Solubility describes how a substance behaves when water is present—and water is almost always present at some level.

    In thin films:

    • Water can act like a roadway
    • It can help transport molecules
    • Or it can trap residues and slow evaporation

    Chemistry that behaves predictably in moisture tends to be easier to control in real-world environments, where surfaces are rarely perfectly dry.


    Why Thin Layers Are So Important

    Thick spills are easy to see and clean.

    Thin layers are the opposite.

    They:

    • Spread across surfaces
    • Hold odors
    • Attract new residue
    • Resist simple wiping

    Understanding thin-layer chemistry explains why certain areas—like sinks, trash containers, pet spaces, and frequently handled surfaces—feel like they “never quite reset.”

    The chemistry isn’t failing.
    It’s working inside a very thin, very stubborn environment.


    Everyday Residues People Instantly Recognize

    Parents and children setting the table and preparing dinner in a tidy kitchen.

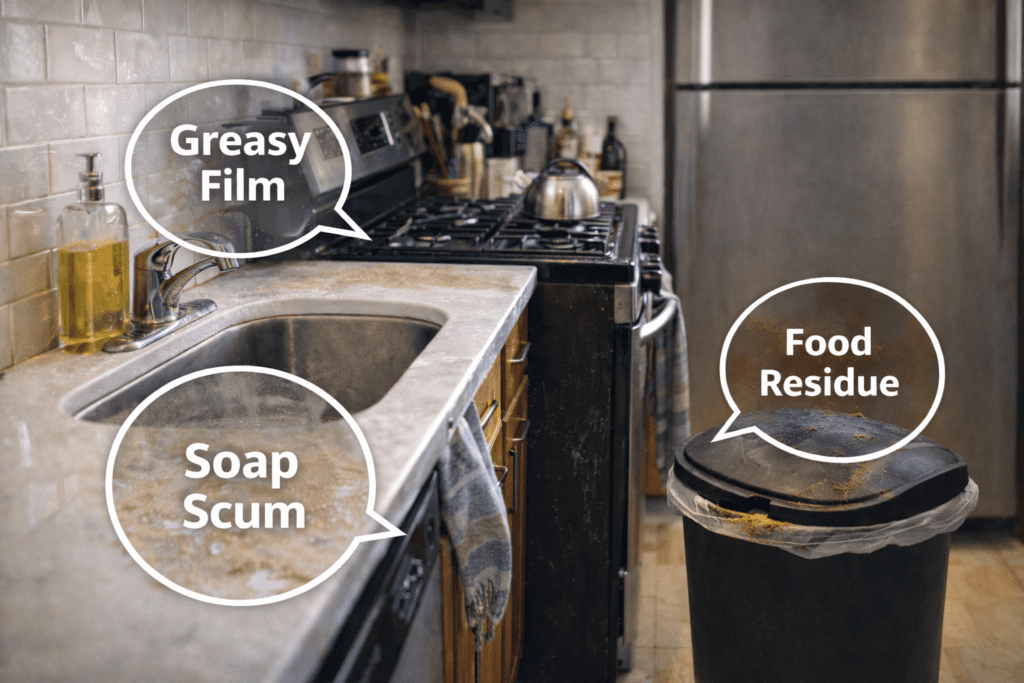
    1. Grease That Feels Dry but Isn’t

    Think:

    • Stove backsplashes
    • Cabinet doors near cooking areas
    • Range hoods

    This residue:

    • Starts oily
    • Mixes with dust
    • Forms a thin, sticky film
    • Becomes harder to remove over time

    It doesn’t look dirty—but it grabs dirt.


    2. Soap Film That Turns Cloudy

    Think:

    • Shower walls
    • Glass doors
    • Sink basins

    Soap residue:

    • Bonds with minerals in water
    • Forms a hazy layer
    • Builds slowly, not all at once

    It’s thin, widespread, and resists quick wiping.


    3. Pet Residue (Even in Clean Homes)

    Think:

    • Dog bowls
    • Floors near feeding areas
    • Furniture fabrics

    Pet-related residue:

    • Includes proteins, oils, and saliva
    • Spreads easily
    • Becomes part of surface films

    This is why areas can smell “off” even when they look clean.


    4. Trash Can Residue

    Even with liners.

    Residue builds:

    • Around the rim
    • Under the bag
    • At the bottom seam

    It’s a mix of moisture + organic material that clings to textured plastic.


    The Key Pattern

    Hard-to-reach residues usually share at least one of these traits:

    • Thin, spread-out layers
    • Moisture involvement
    • Organic material (oils, proteins, soaps)
    • Time

    They aren’t thick.
    They aren’t obvious.
    They don’t respond well to brute force.


    Where Chlorine Dioxide Fits Into This Picture

    Chlorine dioxide chemistry is often discussed in terms of oxidation, but movement plays a role too.

    Its molecular characteristics are part of why it’s considered differently from traditional chlorine-based compounds. Rather than behaving like a heavy surface coating, it’s associated with chemistry that focuses on interaction within thin layers.

    Again, this isn’t a performance claim.
    It’s an explanation of why the chemistry behaves differently.

    If you’re new to chlorine dioxide and want a simple overview, this page provides a foundation:
    What is chlorine dioxide?

    Also Read 👉🏻Why Use Chlorine Dioxide Tablets for Cleaning | ClO₂ Benefits & Uses Guide


    The Big Picture: Cleaning Is Physics + Chemistry

    At the everyday level, cleaning feels like effort.

    At the molecular level, it’s a balance of:

    • Movement
    • Contact
    • Reaction
    • Breakdown

    Once people understand that, cleaning stops feeling random. It becomes a matter of matching chemistry behavior to real-world conditions.

    And that’s where confidence replaces guesswork.

    (FAQs)

    1. Why does cleaning sometimes feel inconsistent?
    Because residue and moisture layers vary, changing how molecules move and interact.

    2. What are thin moisture layers?
    They’re microscopic films of water that remain on surfaces even when they appear dry.

    3. Why does molecular size matter in cleaning?
    Size affects how easily molecules move through thin layers and reach trapped residue.

    4. Is scrubbing harder always more effective?
    Not always. Movement and chemistry often matter more than force.

    5. What role does solubility play in cleaning?
    Solubility affects how substances travel in moisture and interact with residue.

    6. Why do some surfaces seem to hold odors longer?
    Thin films can trap organic compounds that release odor over time.

    7. Does water always help cleaning chemistry?
    Water can help transport molecules, but it can also trap residue depending on conditions.

    8. Why do damp areas feel harder to reset?
    Moisture supports thin films that resist simple wiping.

    9. How does chlorine dioxide relate to movement?
    Its chemistry is associated with interaction in thin layers rather than heavy surface residue.

    10. What’s the benefit of understanding cleaning chemistry basics?
    It reduces frustration and helps people choose approaches that make sense for real conditions.


  • What to Do If You Mixed Chlorine Dioxide at the Wrong PPM | CLO2 Tablets

    What to Do If You Mixed Chlorine Dioxide at the Wrong PPM | CLO2 Tablets

    What Should You Do If You Mixed the Wrong PPM of Chlorine Dioxide?

    Chlorine dioxide (ClO₂) is a precision oxidizing disinfectant. Its performance depends on one critical variable: correct concentration, measured in parts per million (PPM).

    If you mix too weak, you compromise effectiveness.
    If you mix too strong, you waste product and may exceed recommended application levels.

    The solution isn’t guesswork. It’s math — and using the correct yield data for your tablet formulation.


    Understanding PPM in Real-World Tablet Use

    PPM means “parts per million,” which in water applications is equivalent to milligrams per liter (mg/L).

    However, with tablet systems, you must account for actual available chlorine dioxide yield, not just raw tablet weight.

    A 1-gram CLO2 tablet (for instance) does not translate directly into 1,000 mg of free chlorine dioxide in solution. The concentration produced depends on formulation chemistry and conversion efficiency.

    That is why using manufacturer concentration charts is essential.

    Below is the correct working output for 1 gram of activated CLO2 tablet.


    Accurate Mixing Chart – 1 Gram CLO2 Tablet

    Water Volume Approximate PPM
    8 oz 460 PPM
    16 oz 230 PPM
    32 oz 115 PPM
    64 oz 57 PPM
    128 oz (1 gallon) 26 PPM

    These values reflect the actual available chlorine dioxide produced when the tablet is properly activated and dissolved.


    How to Use These Ratios Properly

    washing vegetables

    Now let’s apply this practically.

    If You Need ~100–120 PPM

    Ideal for general hard-surface disinfection.
    → Mix 1 gram into 32 oz of water (115 PPM).

    If You Need ~50–60 PPM

    Common for odor control, light sanitation, and maintenance cleaning.
    → Mix 1 gram into 64 oz of water (57 PPM).

    If You Need ~25 PPM

    Appropriate for low-level maintenance or specific water applications (verify regulatory requirements).
    → Mix 1 gram into 1 gallon (26 PPM).

    If You Need a Stronger Concentrate

    For shock treatment or dilution into larger systems:
    → 8 oz yields 460 PPM
    → 16 oz yields 230 PPM

    These higher strengths are typically used as controlled concentrates and diluted down to working levels.

    Also Read 👉🏼Chlorine Dioxide Cleaning Guide


    What to Do If You Mixed the Wrong PPM

    Scenario 1: You Mixed It Too Weak

    If your concentration is below target:

    • Add additional tablet proportionally based on final desired PPM.
    • Or discard and re-mix using the chart above.
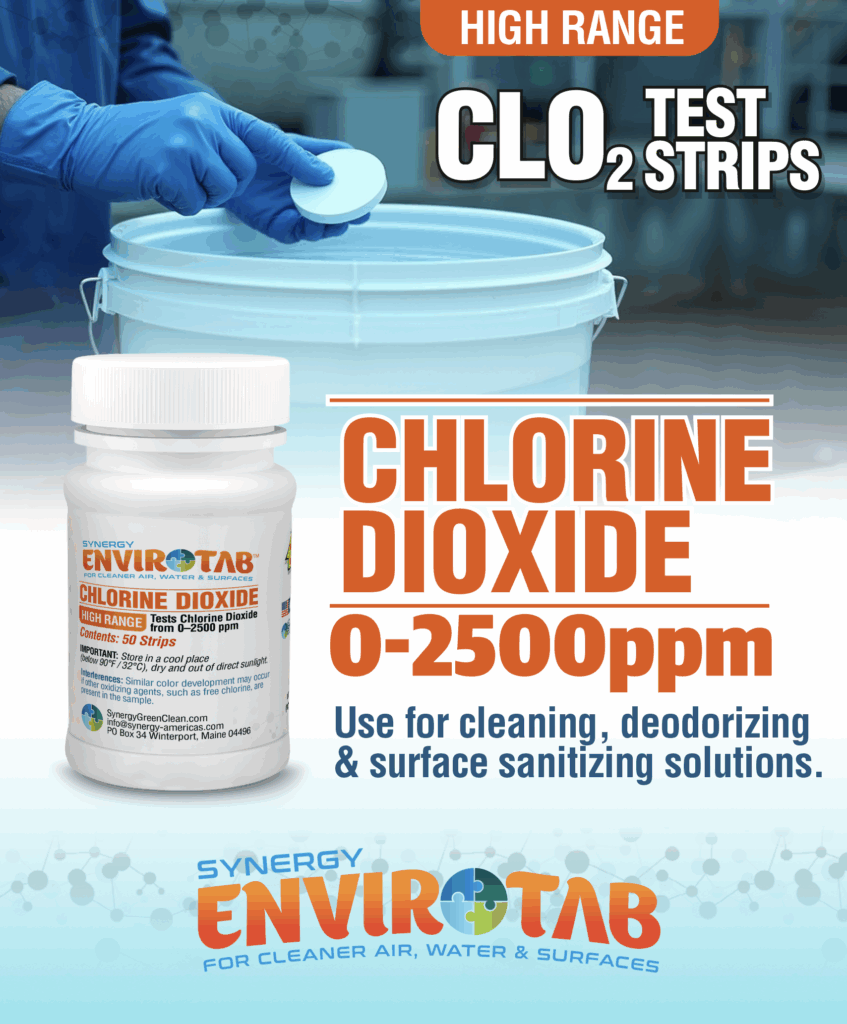
    • Verify concentration when possible using chlorine dioxide test strips.

    Under-concentration affects performance but does not increase material risk.


    Scenario 2: You Mixed It Too Strong

    If your concentration exceeds recommended guidelines:

    • Dilute with clean water.
    • Use proportional dilution.

    Example:

    If you mixed 1 gram into 16 oz (230 PPM)
    But you only need ~115 PPM

    Simply double the water volume to 32 oz total.
    230 PPM diluted 1:1 becomes approximately 115 PPM.

    Another example:

    If you made 8 oz at 460 PPM
    And need ~115 PPM

    460 ÷ 115 ≈ 4

    You would dilute 1 part concentrate with 3 parts water.

    Always mix thoroughly after dilution.

    What To Do If You Notice It’s to Strong.

    If off-gassing becomes too strong and you notice eye irritation, coughing, throat scratchiness, or any breathing discomfort, stop application immediately and move everyone (including pets) to fresh air right away.

    1. Stop immediately. Stop spraying/applying and step away from the solution.

    2. Get everyone to fresh air. Move people and pets outside or to a well-ventilated area right away.

    3. Ventilate fast. Open windows and exterior doors to create cross-breeze; turn on kitchen/bath exhaust fans.

    4. Push air OUT, not around. Place a box fan in a window facing outward to exhaust air outside.

    5. Secure the solution. Carefully cap/close the container and move it to a ventilated area away from living spaces. Don’t lean over open containers.

    6. Rinse irritation. If eyes/skin are irritated, rinse with clean water for several minutes and remove contaminated clothing if needed.

    7. Stay out until clear. Don’t re-enter the treated room until the odor is gone and symptoms have fully resolved. Usually with well ventilated areas, just a couple hours will work.

    8. Get help if symptoms persist. If breathing irritation continues, worsens, or someone has asthma/COPD, seek medical guidance promptly.

    9. Fix the concentration before resuming. Dilute to the correct working PPM (or discard and re-mix if you can’t verify). Use good ventilation and appropriate PPE going forward.

    Also Read 👉🏼How Do I Use Chlorine Dioxide Tablets for Mold Removal?


    Recommended PPM Guidelines by Application

    High Range Test Strip Panel

    While regulations vary by industry, typical professional use ranges include:

    General Surface Disinfection

    100–200 PPM

    Food Contact Surface Sanitization

    50–100 PPM (follow applicable food safety regulations)

    Odor Neutralization

    50–150 PPM

    Biofilm and Water System Maintenance

    5–50 PPM depending on system design

    Potable Water Applications

    Typically below 5 PPM and subject to EPA and local regulation

    Always confirm compliance requirements specific to your industry.


    Why Precision Matters

    Chlorine dioxide works by oxidative disruption of microbial cell structures. Its effectiveness follows concentration-time (CT) principles.

    More is not automatically better.

    Excess concentration does not proportionally increase kill rate. Instead, it can:

    • Stress sensitive materials
    • Increase off-gassing in enclosed environments
    • Waste product
    • Complicate regulatory documentation

    Professional disinfection is controlled chemistry — not aggressive dosing.


    Best Practices to Prevent Future Mixing Errors

    1. Measure water volume before adding tablets.
    2. Use graduated mixing containers.
    3. Post this dilution chart at mixing stations.
    4. Label all mixed batches with date and PPM.
    5. Use test strips when precision verification is required.
    6. Train staff on standardized mixing procedures.

    Consistency builds safety.
    Precision builds trust.

    For detailed product instructions and technical guidance, visit:
    https://clo2tablets.com


    Conclusion

    Incorrect PPM mixing is correctable — but only when addressed with proper chemistry and accurate ratios.

    Using verified tablet yield data ensures:

    • Effective microbial reduction
    • Material compatibility
    • Regulatory compliance
    • Cost efficiency

    When concentration is controlled, chlorine dioxide performs exactly as engineered.

    Precision is not optional in professional sanitation.
    It is the difference between treatment and guessing.

    CLO2 Tablets provide consistent, measurable output when mixed according to labeled guidelines — giving professionals reliable chlorine dioxide performance every time.

    Also See 👉🏼Chlorine Dioxide Cleaning Guide


    (FAQS)

    1. I accidentally mixed chlorine dioxide too strong — did I just make my home unsafe?

    No. A 600 PPM liquid solution is strong, but the risk depends on how it’s being used. If it’s sitting in an open container or heavily sprayed, it can off-gas and create an irritating odor. The fix is simple: increase ventilation immediately and dilute the solution to the correct working strength.


    2. If I mixed it around 600 PPM, should I leave the house?

    If you detect a strong odor or experience throat, eye, or lung irritation, step outside into fresh air immediately. For high concentrations like 600 PPM used indoors, it is best practice to vacate the treated area until ventilation reduces the odor completely. In most residential environments with good airflow, this can take 30 minutes to several hours depending on ventilation.


    3. How long should I air out the house after using a high concentration?

    Ventilate until there is no noticeable chlorine dioxide odor remaining. Open windows, run exhaust fans, and use HVAC circulation if available. With cross-ventilation, most indoor spaces clear within 1–4 hours. Poor airflow may require longer.

    Air exchange is the solution. Fresh air reduces concentration rapidly.


    4. Is it dangerous to breathe chlorine dioxide if it’s too strong?

    High airborne levels can irritate the eyes, nose, and respiratory tract. That irritation is your body’s warning system. If you feel burning, coughing, or discomfort, leave the area immediately and allow it to ventilate fully before returning.

    Short exposure with prompt ventilation is unlikely to cause long-term harm in healthy individuals, but prolonged exposure to strong vapor should always be avoided.


    5. What should I do immediately if I realize I mixed it too strong?

    Follow these steps:

    1. Stop applying the solution.
    2. Open windows and doors.
    3. Turn on fans or HVAC ventilation.
    4. Leave the area if odor is strong.
    5. Dilute the remaining liquid to proper PPM before future use.
    6. Simple airflow and dilution resolve the issue.

    6. Is it safe to sleep in the house if I used a 600 PPM or greater solution earlier?

    Only if the odor is completely gone and the area has been thoroughly ventilated. If any noticeable chlorine dioxide smell remains, continue airing out the space before occupying it for extended periods like sleeping.

    Your nose is a useful guide — if you can smell it strongly, more ventilation is needed.


    7. How can I tell if off-gassing levels are too high?

    Warning signs include:

    • Strong bleach-like or chlorine-type odor
    • Eye irritation
    • Throat scratchiness
    • Coughing

    If any of these occur, leave the area and ventilate immediately. Properly diluted working solutions at recommended PPM ranges should not create overwhelming indoor vapor when used correctly.


    8. Can high PPM damage surfaces in my home?

    Concentrations around 600 PPM are typically considered shock-level strength. While chlorine dioxide is gentler on many materials than traditional bleach, prolonged exposure at high concentration may stress delicate finishes or certain metals. Diluting to 100–200 PPM for general disinfection significantly reduces this risk.


    9. Should I dispose of the solution if it’s too strong?

    If you cannot accurately dilute it to the intended concentration, it is safer to discard according to local regulations and prepare a properly measured batch. In many cases, controlled dilution is sufficient and avoids waste.


    10. How can I prevent this from happening again?

    Use a printed dilution chart and measure water volume before adding tablets. For example:

    • 1 gram in 32 oz = 115 PPM
    • 1 gram in 64 oz = 57 PPM
    • 1 gram in 1 gallon = 26 PPM

    Clear measurement prevents over-concentration and eliminates fear.

  • Why Isn’t Chlorine Dioxide the Same as Bleach? A Chemistry Explanation

    Why Isn’t Chlorine Dioxide the Same as Bleach? A Chemistry Explanation

    Same Family Name, Very Different Behavior

    It’s a common assumption:

    “If it has ‘chlorine’ in the name, it must work like bleach.”

    Chemically speaking, that’s a bit like assuming carbon dioxide behaves like charcoal because both contain carbon. Names can be misleading. What matters is molecular structure and how a compound reacts.

    Chlorine dioxide (ClO₂) and household bleach (commonly sodium hypochlorite) are fundamentally different substances. Understanding why they behave differently doesn’t require a chemistry degree—just a look at how molecules interact.


    A Quick Clarification: Names vs. Chemistry


    Bleach is typically a chlorine-based compound dissolved in water, forming hypochlorous-related species. It reacts readily with many substances and tends to leave behind secondary compounds as it breaks down.

    Chlorine dioxide, by contrast, is a neutral gas dissolved in water. Its structure and behavior are different from elemental chlorine or hypochlorite solutions.

    The shared word “chlorine” describes an element involved—not how the chemistry actually works.


    Molecular Structure: Why Shape Matters

    At the molecular level, structure determines behavior.

    Bleach-related compounds:

    • React broadly
    • Tend to bind quickly
    • Can leave residues or secondary reaction products

    Chlorine dioxide:

    • Has a smaller, neutral molecular form
    • Acts primarily through oxidation reactions
    • Does not behave like a “sticky” chlorine compound

    This difference in structure helps explain why the two substances interact with surfaces, residues, and organic material in different ways.


    Reaction Style: Broad vs. Selective Chemistry

    A helpful way to think about this is reaction style.

    Some chemicals react with almost everything they touch. Others interact more selectively with certain types of compounds.

    Bleach chemistry tends to:

    • React quickly and broadly
    • Alter a wide range of materials
    • Produce noticeable chemical signatures

    Chlorine dioxide chemistry tends to:

    • Focus on specific reactive sites
    • Change certain organic compounds at the molecular level
    • Break down without forming the same kinds of chlorine-based residues

    This distinction matters when the goal is understanding why outcomes feel different, not making performance claims.

    Also Read 👉🏻From Bleach to Breakthrough: Why Smart Cleaners Are Choosing CLO₂


    Residue, Smell, and “Chemical Footprints”

    Many people associate bleach with a strong, lingering smell. That scent isn’t just “clean”—it’s a sign of reactive chemistry and byproducts.

    Chlorine dioxide behaves differently. Because it follows a different oxidation pathway, it doesn’t leave the same type of chemical footprint behind.

    Again, this isn’t about “better” or “worse.”
    It’s about different chemistry doing different things.


    Why This Difference Matters for Everyday Understanding

    For everyday users, the takeaway isn’t technical—it’s practical understanding:

    • Not all chlorine-containing compounds behave the same
    • Strong smell doesn’t equal stronger chemistry
    • Molecular structure shapes how substances interact with residue and odor
    • Different tools exist because different problems exist

    Once people understand that, cleaning stops feeling like guesswork and starts feeling logical.


    Where Chlorine Dioxide Fits Into the Bigger Picture

    Chlorine dioxide sits in a category of chemistry focused on controlled oxidation rather than blanket reaction. That’s why it’s often discussed separately from traditional chlorine-based cleaners.

    If you’d like a simple overview of what chlorine dioxide is (without technical jargon), this page covers the basics:
    What is chlorine dioxide? https://clo2tablets.com/what-is-chlorine-dioxide/

    FAQs

    1. Is chlorine dioxide the same thing as bleach?
    No. They are chemically different substances with different molecular structures and reaction behaviors.

    2. Why do both contain the word “chlorine”?
    They both involve the element chlorine, but the element behaves differently depending on how it’s bonded in a molecule.

    3. Why does bleach have such a strong smell?
    The smell comes from reactive chlorine-related compounds and byproducts formed during reactions.

    4. Does chlorine dioxide smell the same as bleach?
    No. Chlorine dioxide follows a different chemical pathway and does not produce the same chlorine-type odor.

    5. Are these chemicals interchangeable?
    They serve different purposes and behave differently due to their chemistry.

    6. Why does molecular structure matter in cleaning chemistry?
    Structure determines how a molecule reacts, what it interacts with, and what byproducts form.

    7. Is oxidation the same as chlorination?
    No. Oxidation refers to electron transfer reactions, while chlorination involves chlorine bonding directly to compounds.

    8. Do stronger smells mean stronger chemistry?
    Not necessarily. Smell reflects volatility and byproducts, not overall chemical effectiveness.

    9. Why is chlorine dioxide discussed separately from bleach?
    Because its chemistry, structure, and reaction behavior are fundamentally different.

    10. What’s the benefit of understanding these differences?
    It helps people make informed choices and understand why different products behave differently.


  • What Is Oxidation, and Why Does It Change Smells and Residue?

    What Is Oxidation, and Why Does It Change Smells and Residue?

    The Quiet Chemistry Behind “Fresh” vs. “Still There”

    You’ve probably noticed something weirdly consistent in life:

    Some smells disappear quickly.
    Others cling like they pay rent.

    Some residues wipe away easily.
    Others keep coming back—especially in damp places.

    That isn’t just “strong smell vs. weak smell.” A lot of it comes down to molecular structure—and one of the most important forces shaping that structure is oxidation.

    Oxidation is one of those science words people hear in school and then abandon like an old gym membership. But in real life, oxidation is everywhere: browning apples, rust on metal, stale air in a closed room, and yes—changes in the molecules that create odor and grime.

    Today we’re going to make oxidation feel simple, useful, and honestly kind of fascinating.


    What Oxidation Actually Means (No Lab Coat Required)

    At the smallest scale, chemistry is about electrons—tiny particles that help atoms stick together to form molecules.

    Oxidation happens when a molecule loses electrons (or effectively shifts electrons during a reaction). The important takeaway isn’t the textbook definition—it’s what oxidation does:

    Oxidation often changes a molecule’s shape and behavior.

    That’s why oxidation can change things like:

    • Smell
    • Color
    • Stickiness
    • How long a residue lasts
    • Whether a compound stays “stable” or breaks apart

    So when something oxidizes, it’s not just getting “cleaner.” It’s getting chemically different.


    Why Odors Are Chemistry Problems, Not “Nose Problems”

    Most odors are caused by volatile compounds—meaning molecules that easily float into the air and reach your nose.

    A helpful way to think about odor molecules:

    • They’re small enough to travel
    • They have shapes that “fit” odor receptors in your nose
    • They often contain reactive parts that can change form over time

    Here’s the key:
    If the structure of an odor molecule changes, it may no longer “fit” the same receptors.

    So the smell can weaken, shift, or disappear—not because it got covered up, but because the odor molecule is no longer the same molecule.

    That’s one reason oxidation matters so much in odor control and residue breakdown.


    Oxidation in Everyday Life: Easy Examples That Make It Click

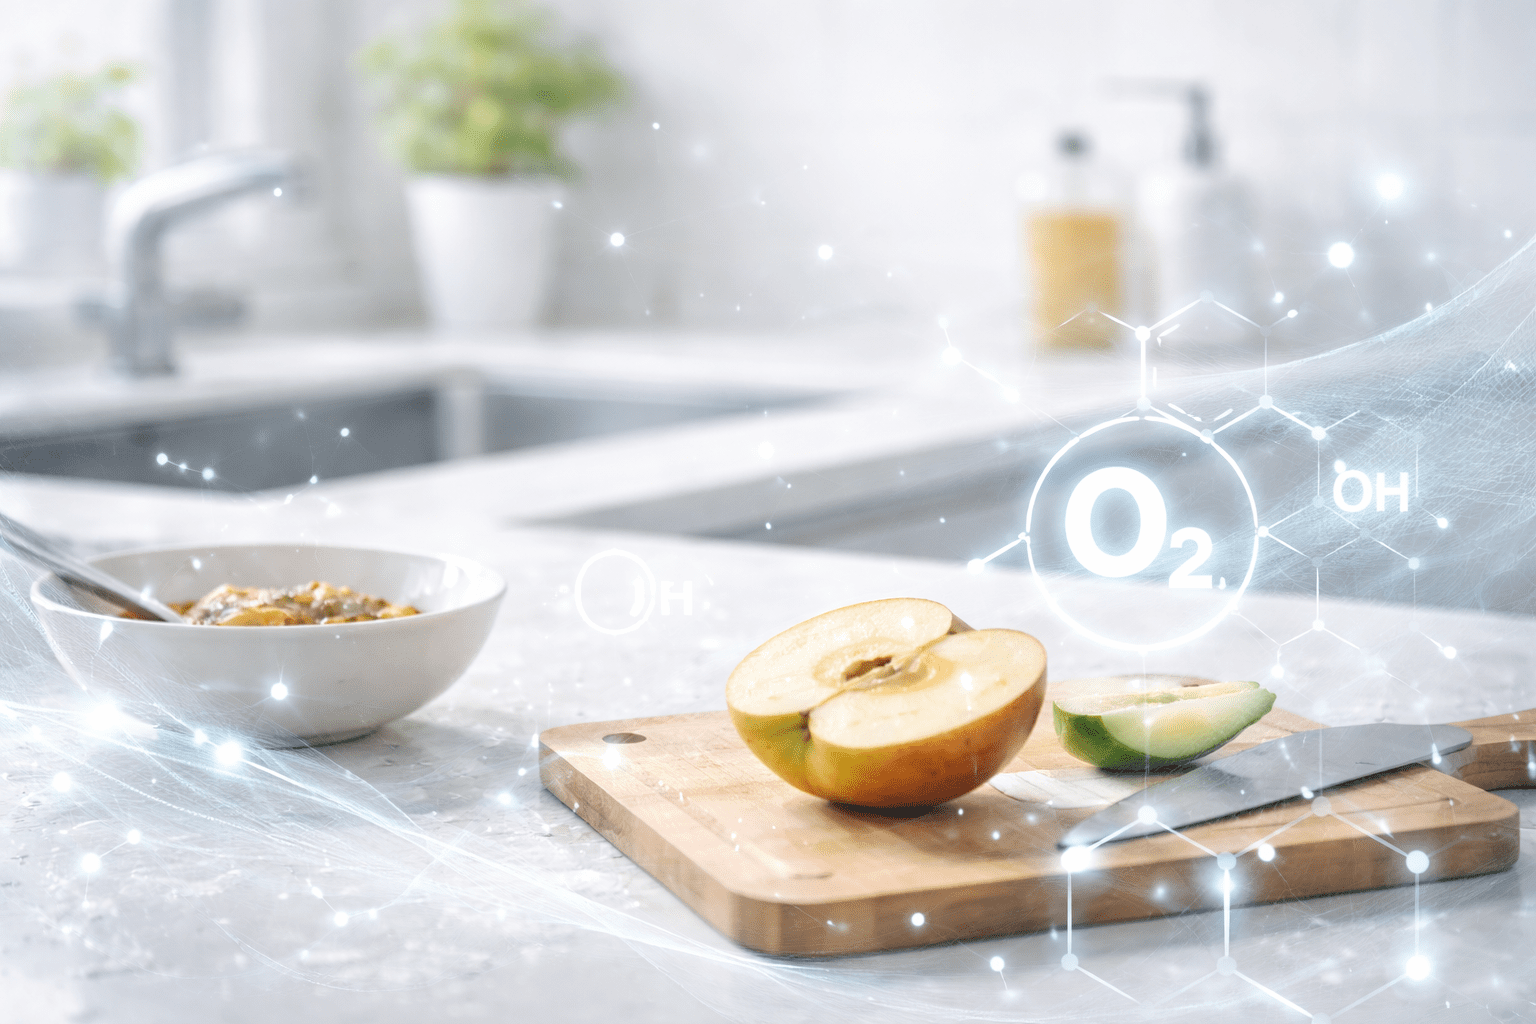
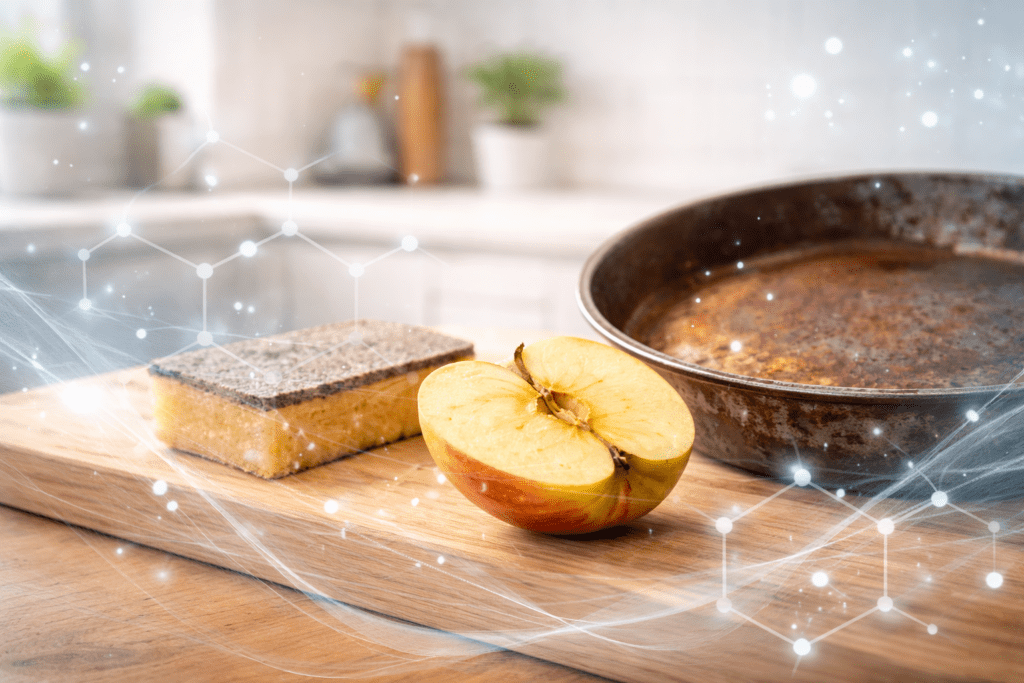
    Everyday kitchen items showing natural oxidation with subtle scientific overlay.

    Apples turning brown

    That browning is oxidation-driven chemistry happening in the fruit.

    Rust on metal

    Iron reacts with oxygen and moisture. The metal changes into a different compound—rust.

    Old cooking smells in fabrics

    Many cooking odors come from organic compounds that bond and linger in fibers, especially when moisture is present.

    In all three examples, oxidation is doing one job: transforming molecules into new forms.


    Why Some Residues Become “Sticky Layers” Over Time

    Many residues in homes aren’t just dirt—they’re mixtures of organic compounds:

    • Oils
    • Grease
    • Soap film
    • Skin oils
    • Food particles
    • Pet-related residues
    • Damp organic buildup

    When those compounds sit in moisture-rich conditions, they don’t just “wait.” They can:

    • Bond to surfaces
    • Combine with other compounds
    • Form thin films that attract more residue
    • Become more stubborn over time

    That’s why it’s common for certain areas to develop that “always slightly there” feeling—especially around sinks, trash containers, damp corners, and frequently used surfaces.

    Also Read 👉🏻What Are Biofilms, and Why Do They Form on Everyday Surfaces?


    Where Chlorine Dioxide Fits Into the Science (In Plain Language)

    Chlorine dioxide (ClO₂) is interesting because it’s known for oxidation behavior—meaning it participates in reactions that can change certain organic compounds at the molecular level.

    We’re not talking about “harshness.” We’re talking about chemistry style.

    Some oxidizers behave in broad, messy ways that leave a strong chemical fingerprint. Others behave more selectively and don’t hang around as long.

    One reason people look into chlorine dioxide technology is because it’s fundamentally about molecular change—not just masking, covering, or perfuming.

    If you want a simple starting point on what chlorine dioxide is, this page gives the basics:
    Chlorine dioxide overview: https://clo2tablets.com/what-is-chlorine-dioxide/

    (And don’t worry—we’ll keep this whole series in the everyday-science lane.)


    The Big Takeaway: Oxidation Is “Molecule Editing”

    If you remember one idea from this article, make it this:

    Oxidation is like molecule editing.

    It can change:

    • how a compound behaves
    • whether it clings to a surface
    • whether it stays volatile (smelly)
    • whether it breaks down into simpler parts

    Once you understand oxidation, a lot of home “mystery problems” suddenly feel less mysterious—and more solvable with smarter chemistry.


    (FAQs)

    1. What is oxidation in simple terms?
    Oxidation is a chemical process where molecules change by shifting electrons, often changing how they smell, look, or behave.

    2. Why does oxidation matter for odors?
    Many odors come from volatile molecules. If oxidation changes their structure, they may no longer smell the same—or may stop being noticeable.

    3. Does oxidation remove odors or cover them up?
    Oxidation can chemically change certain odor-causing compounds, which is different from covering them with fragrance.

    4. Why do some smells linger longer than others?
    Some odor molecules are more stable, bond to surfaces more easily, or hide in moisture-rich films and porous materials.

    5. Can residue change over time even if it looks dry?
    Yes. Thin films can persist and interact with moisture in the air, gradually changing and attracting more buildup.

    6. Is oxidation the same thing as oxygen?
    Not exactly. Oxidation involves chemical reactions that may include oxygen, but oxidation can also occur through other oxidizing agents.

    7. Why do damp areas hold smells more stubbornly?
    Moisture helps residues form thin films, slows drying, and can trap organic compounds that release odor over time.

    8. What kinds of household odors involve organic compounds?
    Common examples include cooking odors, trash odors, pet odors, musty fabrics, and residues that cling to damp surfaces.

    9. How does chlorine dioxide relate to oxidation?
    Chlorine dioxide is known for oxidation behavior, meaning it can participate in reactions that change certain organic compounds at the molecular level.

    10. What’s the benefit of learning oxidation basics?
    It helps you understand why smells and residues behave the way they do, so cleaning choices feel more logical and less trial-and-error.


  • What Are Biofilms, and Why Do They Form on Everyday Surfaces?

    What Are Biofilms, and Why Do They Form on Everyday Surfaces?

    When “Clean” Doesn’t Stay Clean

    Most people have experienced it.

    You clean a sink.
    A few days later, the slick feeling is back.
    You wash a pet bowl, wipe a trash can, scrub a damp corner—yet something about the surface still feels off.

    This isn’t poor cleaning. It isn’t laziness.
    It’s chemistry and biology doing what they’ve done for billions of years.

    To understand why some household messes return, we need to zoom in—far past what the eye can see—and talk about biofilms, one of nature’s most effective survival strategies.


    What Is a Biofilm, Really?

    ClO2 Header Image

    A biofilm isn’t a single organism.
    It’s a community.

    Microscopic organisms naturally prefer to live together rather than alone. When conditions are even slightly favorable—moisture, warmth, and a food source—they begin producing a sticky matrix made of sugars and proteins. This matrix anchors them to surfaces and to each other.

    Think of it less like dust and more like a microscopic neighborhood with shared walls.

    This structure:

    • Holds moisture
    • Traps organic material
    • Slows evaporation
    • Cushions the organisms from their environment

    Once formed, the biofilm acts like a thin, invisible shield.


    Why Biofilms Form So Easily in Everyday Spaces

    Biofilms don’t require extreme environments.
    They form anywhere moisture lingers long enough.

    Common household locations include:

    • Sink drains and overflows
    • Trash cans and recycling bins
    • Pet bowls and litter areas
    • Sponges, cloths, and mop heads
    • Bathroom grout and shower edges
    • Refrigerator drip trays

    These locations share three things:

    1. Water
    2. Organic matter
    3. Time

    No dramatic contamination is required. Ordinary daily life supplies everything biofilms need.


    The Sticky Truth: Why Wiping Alone Often Isn’t Enough

    Many cleaning methods focus on surface removal—wiping away what’s visible.

    Biofilms complicate that.

    The outer layer of a biofilm can appear clean while the internal structure remains intact. The sticky matrix:

    • Holds onto surfaces tightly
    • Slows down chemical reactions
    • Reduces how deeply cleaning agents penetrate

    This is why a surface may look clean yet regain odor, slickness, or residue quickly. The underlying structure was never fully disrupted.

    Also Read 👉🏻Chlorine Dioxide Tablets for Kitchen & Bathroom Cleaning


    A Simple Analogy: Raincoats vs. Rain

    Imagine standing in heavy rain.

    Now imagine wearing a raincoat.

    The rain still falls—but its impact changes.
    Biofilms function similarly. They don’t stop interaction entirely, but they slow it, redirect it, and buffer it.

    This buffering effect is what makes recurring messes so frustrating.


    Where Chemistry Enters the Conversation

    At this point, chemistry matters more than scrubbing strength.

    Different cleaning technologies interact with biofilms in different ways:

    • Some react mostly at the surface
    • Some leave residues behind
    • Some struggle to move through moisture layers

    Understanding how molecules move, react, and disperse is more important than how harsh a cleaner feels.

    This is where chlorine dioxide chemistry becomes interesting—not because it is “strong,” but because it behaves differently at the molecular level. That difference will be explored step-by-step in the articles ahead.

    Also Read 👉🏻Ways to Prevent Persistent Odors From Returning for Good In 2026


    Why This Knowledge Matters for Everyday Users

    This isn’t about fear or overthinking cleaning.

    It’s about expectations.

    When people understand that recurring messes are often structural—not personal failure—they make better choices:

    • More informed cleaning routines
    • Better rotation of tools and materials
    • Smarter use of chemistry instead of brute force

    Knowledge removes frustration. Science replaces guesswork.

    What Comes Next in This Series

    In the next article, we’ll explore oxidation—a natural chemical process that explains why some odors disappear while others linger.

    No scare language.
    No restricted claims.
    Just clear, grounded science that explains what’s happening at the molecular level.

     (FAQs)

    1. What is a biofilm in simple terms?
    A biofilm is a sticky layer created by microscopic organisms that helps them stay attached to surfaces and retain moisture.

    2. Are biofilms visible to the naked eye?
    Most biofilms are invisible, though they may cause slickness, residue, or recurring odors.

    3. Why do biofilms form in wet areas?
    Moisture allows the protective matrix to remain stable and prevents drying that would disrupt it.

    4. Can regular wiping remove biofilms?
    Wiping may remove surface material but often leaves the underlying structure intact.

    5. Why do odors come back after cleaning?
    Odors often originate from organic material trapped within thin moisture layers.

    6. Are biofilms harmful?
    Biofilms are a natural phenomenon; their significance depends on location and context.

    7. Do all surfaces develop biofilms?
    Any surface exposed to moisture and organic matter can develop them over time.

    8. Why do drains feel slippery even after cleaning?
    That slick feeling often comes from remaining biofilm layers holding moisture.

    9. Is stronger cleaning always better?
    Not necessarily. Chemistry and molecular behavior matter more than force.

    10. What’s the benefit of understanding biofilms?
    It helps set realistic expectations and leads to smarter, more effective cleaning choices.